Intro
To get started with Domo Everywhere, you must establish a connection between the publishing instance and all of the subscribing instances. The Domo administrator for the publishing instance creates and maintains the connections to the subscribing instances from the Domo Everywhere page. See Access Domo Everywhere below for more information on setting this up. After configuring routing, the Domo admin must create each subscribing instance within the publishing instance and provide key attributes for the individual users so that as they log in they are mapped to the appropriate subscribing instances. After the admin provides the key attributes, Domo completes mapping automatically. The admin can then view the mapping details from within the publishing instance.
Prerequisites
Complete the following before routing, creation, and mapping:- Purchase the Domo Everywhere product.
- Configure the publishing instance in Domo.
- Find your instances’ authentication method in the following table and get the required information.
Authentication Method | Description |
|---|---|
JWT Secret | This method requires the simplest implementation. If your system hosts key attributes used to authenticate the identity of your users, choose JWT Secret. No additional information is needed. Generate the secret as instructed in the UI. |
JWT Public Key | If your organization uses this method, you can get the Public Key from your IT manager. |
OpenID Connect (OIDC) | You need the following information:
|
SAML (SSO) | You need the following information: |
Access Domo Everywhere
From the Domo navigation header, select More > Admin to open the Admin Settings. Under Domo Everywhere, go to the section you need to complete the task.
Routing
After completing the prerequisites, complete the following tasks to configure routing.Choose the Authentication Method
- Access Domo Everywhere and go to the Embed section.

- In the Embed section, go to the Routing tab.
- Select your authentication method from the menu.
- Fill in the information for your authentication method.
Grant Embed Access


Download Routing Certificate
This security feature is optional. If your website or portal requires certificate encryption between Domo and the website, you can download the certificate here. To download the certificate, select Download to the right of the Routing Certificate field.
Uploading the Routing Certificate to the Subscribing Instance
After you download the Routing Certificate, you can upload it to a subscriber’s Domo environment by following these steps:- Load the Domo environment you want to upload the certificate to.
- Access Domo Everywhere and select Embed.
- Go to the Routing tab.
- In the Authentication Method menu, select SAML (SSO).
-
Select
Edit.
The Edit SAML (SSO) dialog displays.
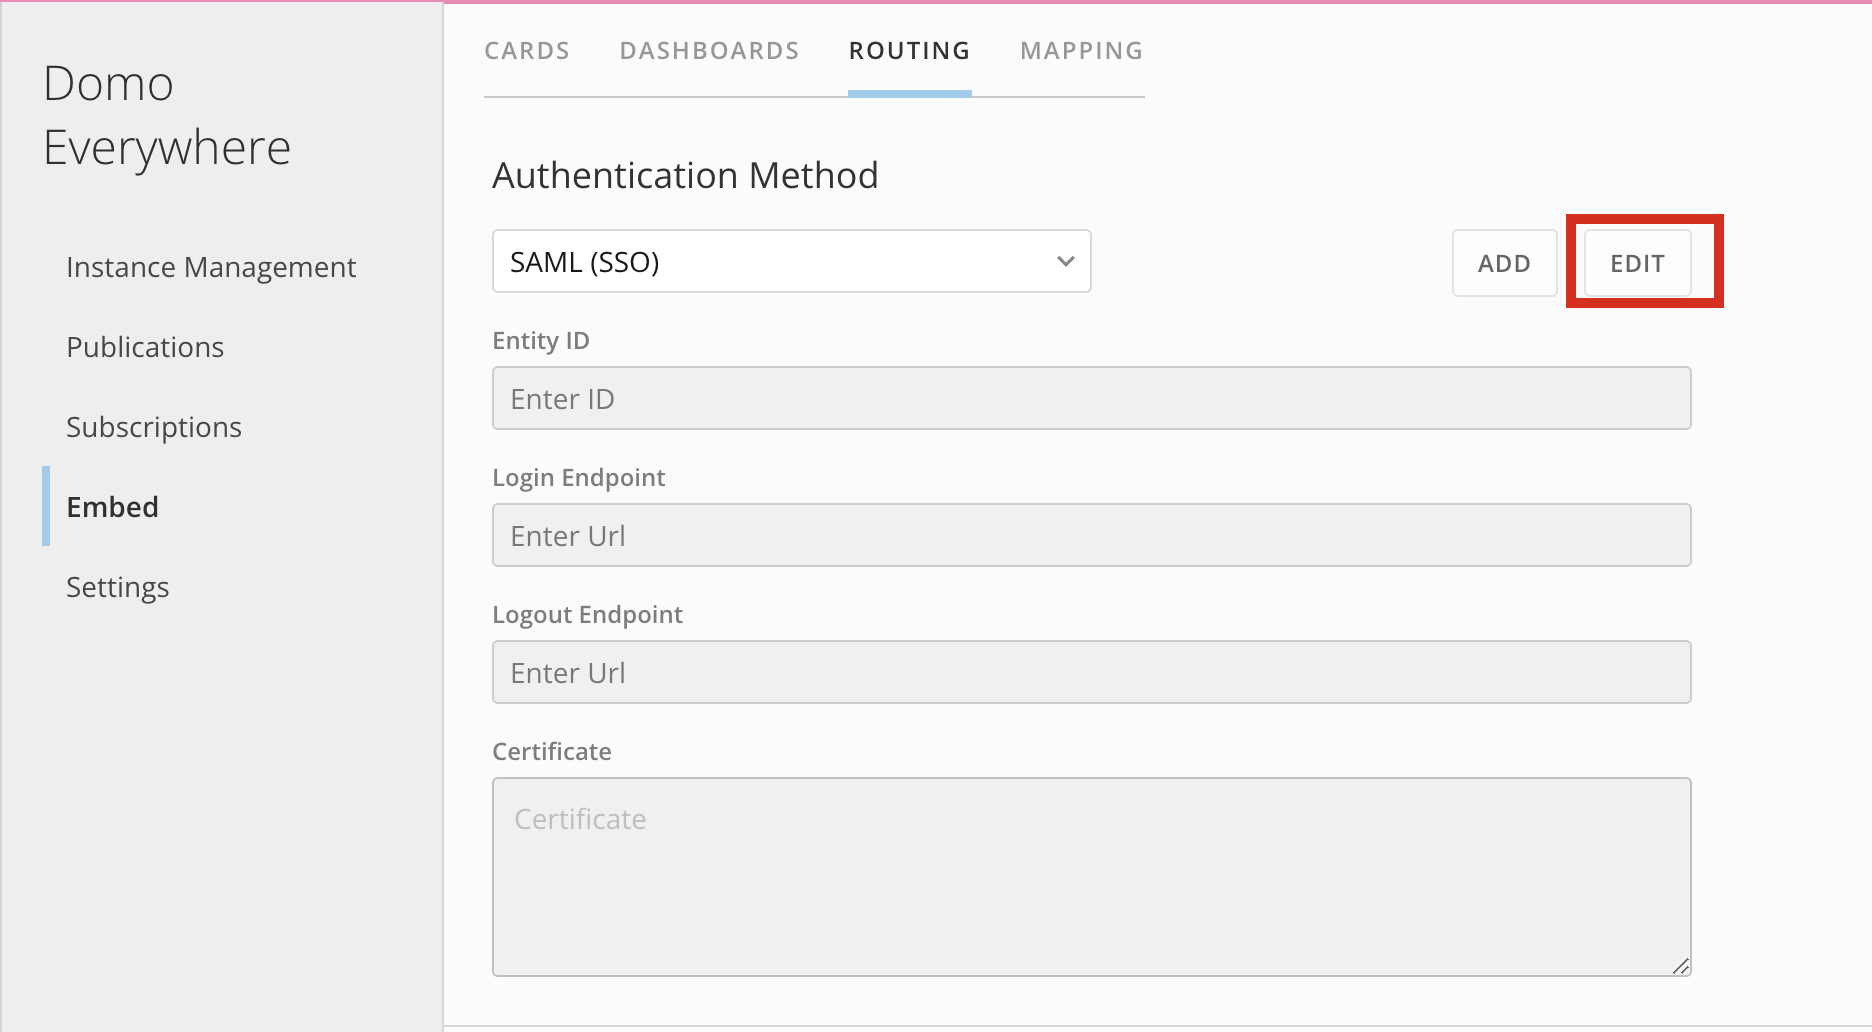

- In the Certificate field, enter the Routing Certificate.
- Select Save.
Paste the Embed URL
After you have chosen the authentication method and configured all security features, you can view the embed URL.-
Copy the address in the
Embed Url for identity broker field by selecting
 Copy.
Copy.
-
Paste the address into your host site or software to redirect users to their mapped account.
 Note: If the format of your URL does not display as https:// domain . identity.domo.com , contact your account team.
Subscriber Instance Setup
After setting up routing, the next step is adding subscriber organizations to receive your published content. A Domo admin can create, update, and delete any number of subscribing instances based on needs and workflows. Before creating a subscriber instance for the first time, you must define your key attribute. Domo uses the key attribute to map a user to an instance. To help you determine your key attribute, consider which field in a user’s Domo profile comes from your identity provider (IdP). Common examples arecustomer ID and partner ID. We recommend renaming the Key attribute field to your preferred value.
After you define your key attribute once, you can skip this section and begin with Create a Subscriber Instance.
Define the Key Attribute
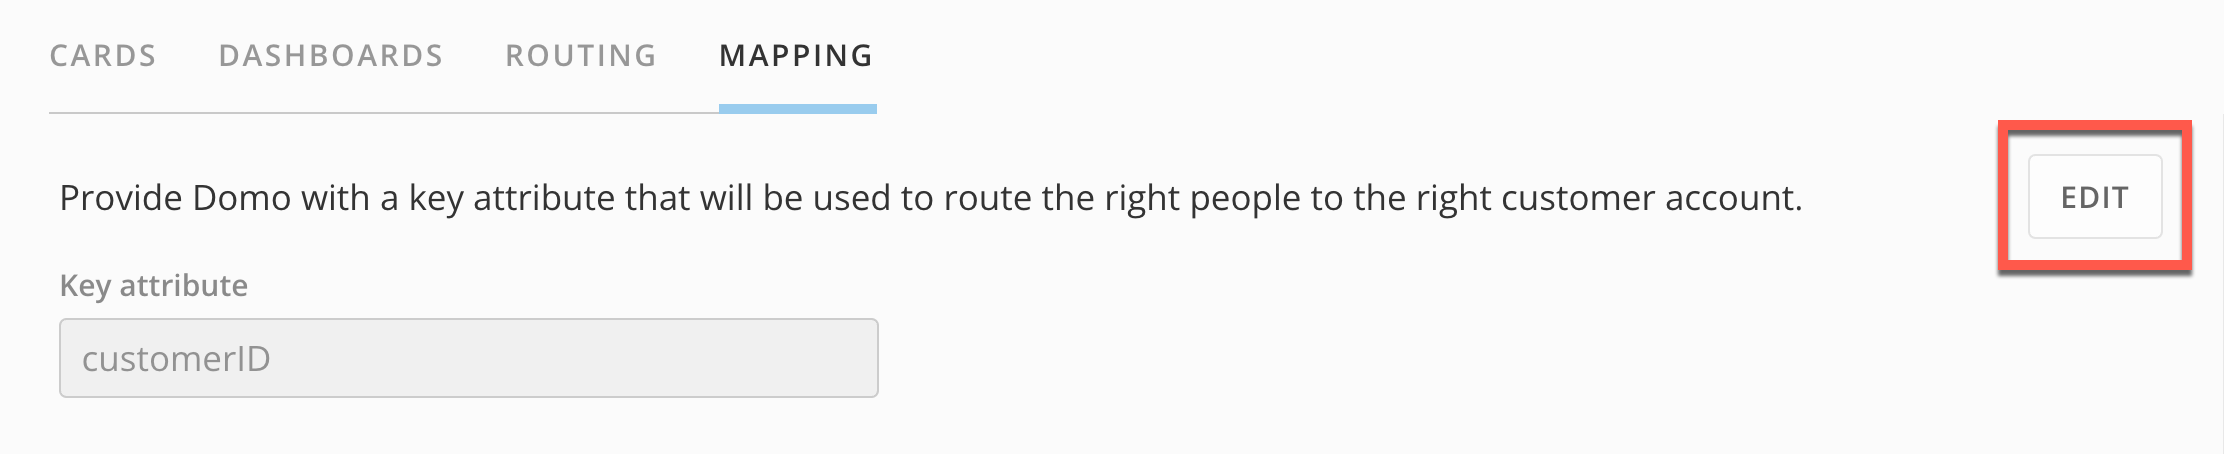
- In Domo Everywhere, go to the Embed section.
- In Embed, go to the Mapping tab. At the top of the Mapping tab, the Key attribute field displays
-
Select
Edit to edit the field and name your key attribute.
The Edit key attribute modal displays.
You can name your key attribute whatever your organization uses for the value that identifies your customers. In this example, we are using customerID.

- After you enter your key attribute name, select Save.
Create a Subscriber Instance
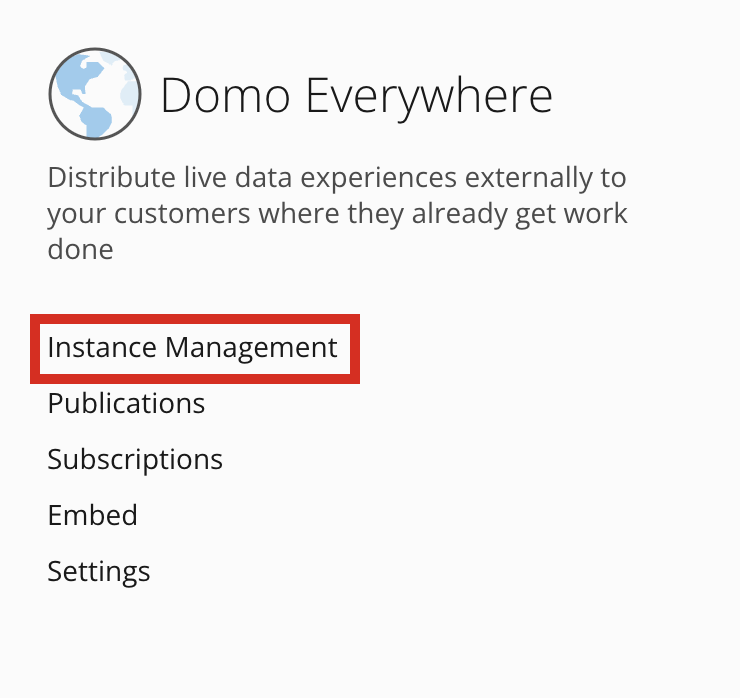
If your key attribute is defined, follow these steps to create a subscriber instance.-
Access Domo Everywhere
and go to the Instance Management section.
The Instances section of Domo Everywhere displays.
-
Select
+ New Instance.
The New Instance Creation modal displays.

- In the modal, enter the Instance Name. We recommend giving the instance a name that corresponds with a service account that the organization uses consistently to validate all end customer accounts .
- Enter the Service account email.
- Enter the value for your key attribute, which displays in the modal how you configured it in the Mapping tab. In this example, the key attribute is configured as the customerID.
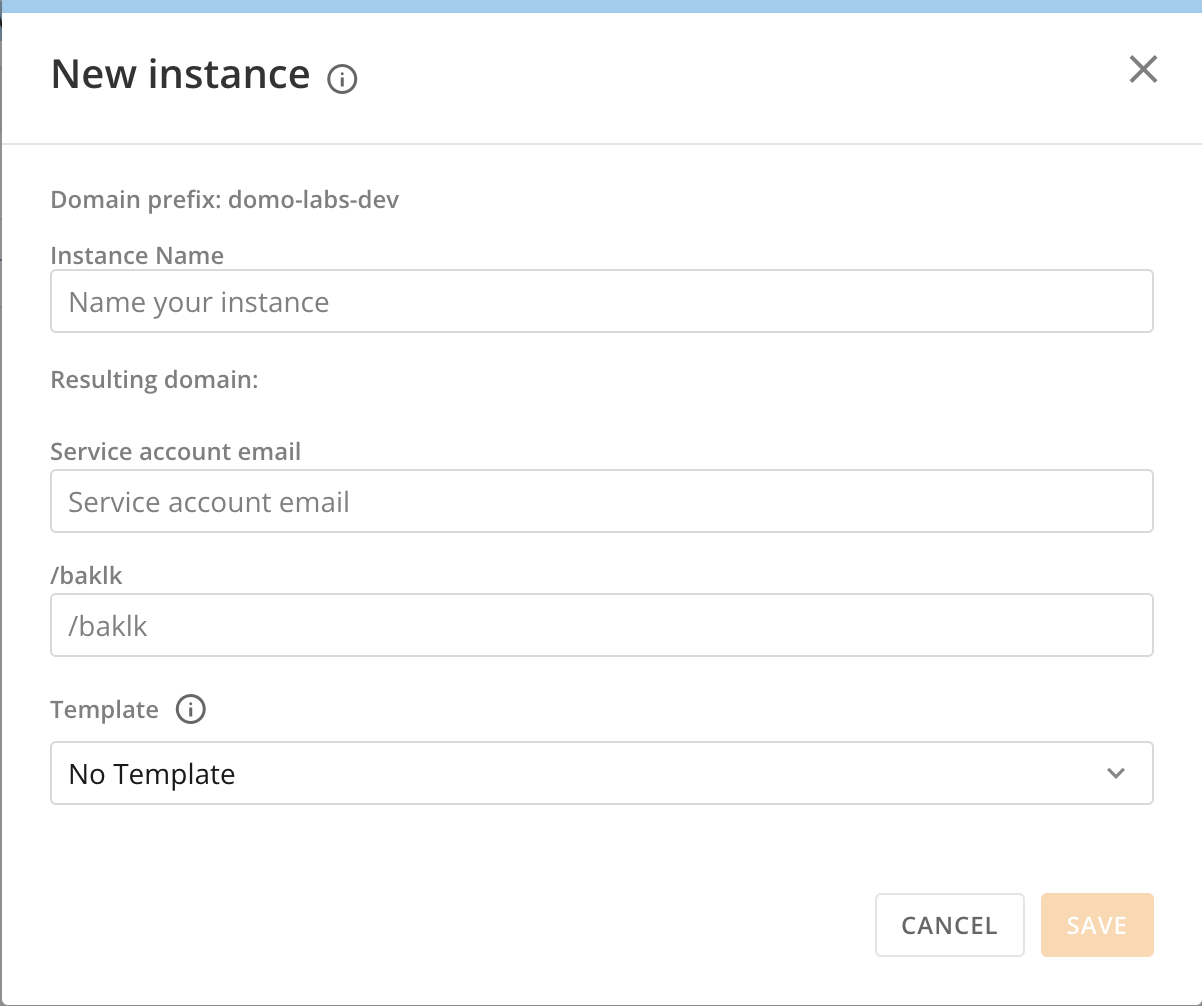
- (Optional) Check the box if you want to share with the default group.
- Select Save.
Remove a Subscriber Instance
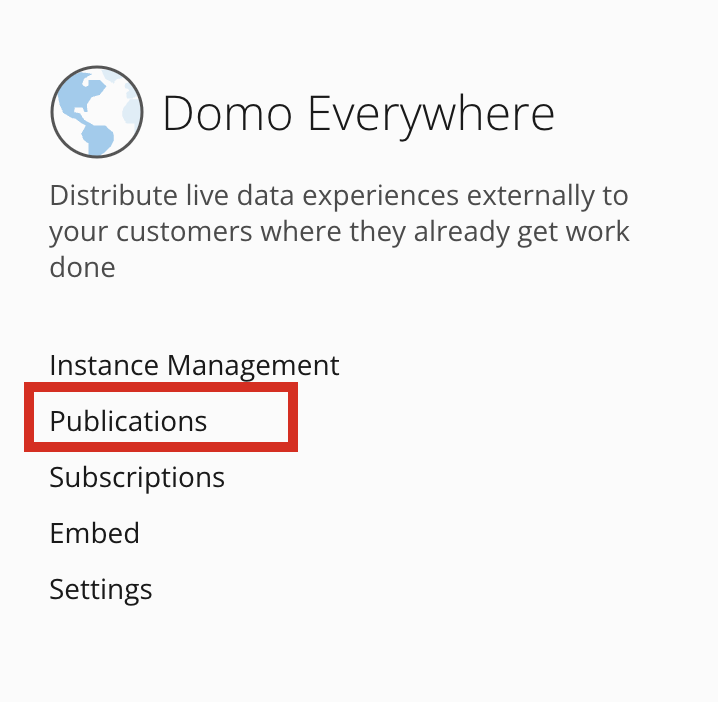
- From the navigation header, go to More > Admin. The Admin Settings display.
-
In the
Domo Everywhere menu, select Publications.
The Publications page displays.

-
Open the
Subscribers tab.
Each subscriber instance displays as a row.

-
Select
 More for the subscriber you want to remove.
The edit and delete options display.
More for the subscriber you want to remove.
The edit and delete options display.


-
Select
 Delete Subscriber.
A dialog displays where you must acknowledge that you understand that the subscriber is being removed from Domo permanently and that access to that subscriber’s Domo environment will be revoked.
Delete Subscriber.
A dialog displays where you must acknowledge that you understand that the subscriber is being removed from Domo permanently and that access to that subscriber’s Domo environment will be revoked.

- Select Delete to remove the subscriber or Cancel to cancel the operation.
Mapping
After creating an instance, it’s time to set its key attribute for mapping. Users are mapped according to the Attribute Value on the left side of the mapping table. As each user signs into the host portal, Domo redirects the iframe to the Child instance URL listed on the right side of the mapping table.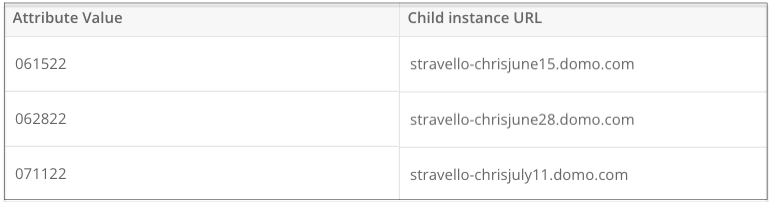
- From the navigation header, go to More > Admin.
- In the Domo Everywhere menu, select Embed.
- Go to the Mapping tab.
- Select + Add Mapping.
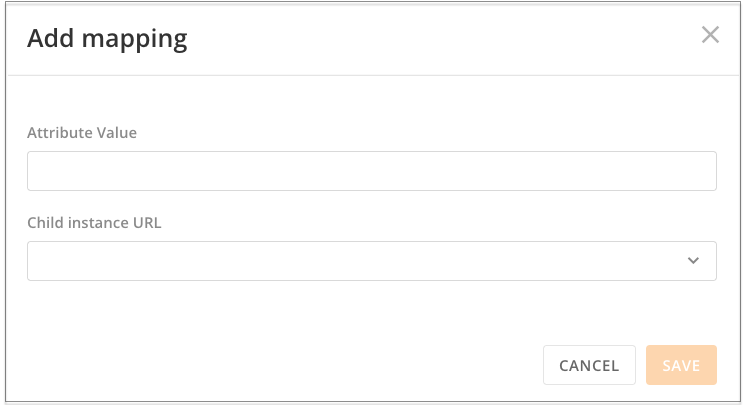
- In the dialog, fill in the Attribute Value and the Child instance URL for the user.
- Select Save.
Change the Key Attribute Name
- Inside Domo Everywhere, go to the Embed section.
- Go to the Mapping tab.
- In the Key attribute field, enter the value you would like to use instead.
Troubleshooting
This usually occurs if you have changed the Key Attribute name from the default and your host page has not adjusted to watch for the new name. The default always looks for “keyAttribute.” We recommend you change it to the field in your data and user profiles. Common examples include “Customer ID” and “Partner ID.”

FAQ
My customer has a certain template they apply to their users. How can I make sure that template is used?
My customer has a certain template they apply to their users. How can I make sure that template is used?
I need to create multiple subscribers. Is there a bulk creation option?
I need to create multiple subscribers. Is there a bulk creation option?
Can I automate the bulk creation of instances programmatically via API?
Can I automate the bulk creation of instances programmatically via API?
When a user logs into the customer portal, a new user is created in Domo and given an Admin default security role. Is it possible to change this setting, so that subscribers aren't Admins by default when no role is selected?
When a user logs into the customer portal, a new user is created in Domo and given an Admin default security role. Is it possible to change this setting, so that subscribers aren't Admins by default when no role is selected?