Intro
Tasks are generated by a workflow (in Domo Workflows) and represent a manual step in that workflow. Each task includes a form that needs to be completed by a person. When the task is complete, the workflow progresses to the next step. Task Center (formerly Queues) allows you to organize manual tasks created in Workflows into different buckets of work—queues—and control who can access them. Learn more about Workflows. Task Center is also available for your mobile device. Find the Domo’s Task Center app in the Apple App Store or Google Play Store. Learn about the Task Center app.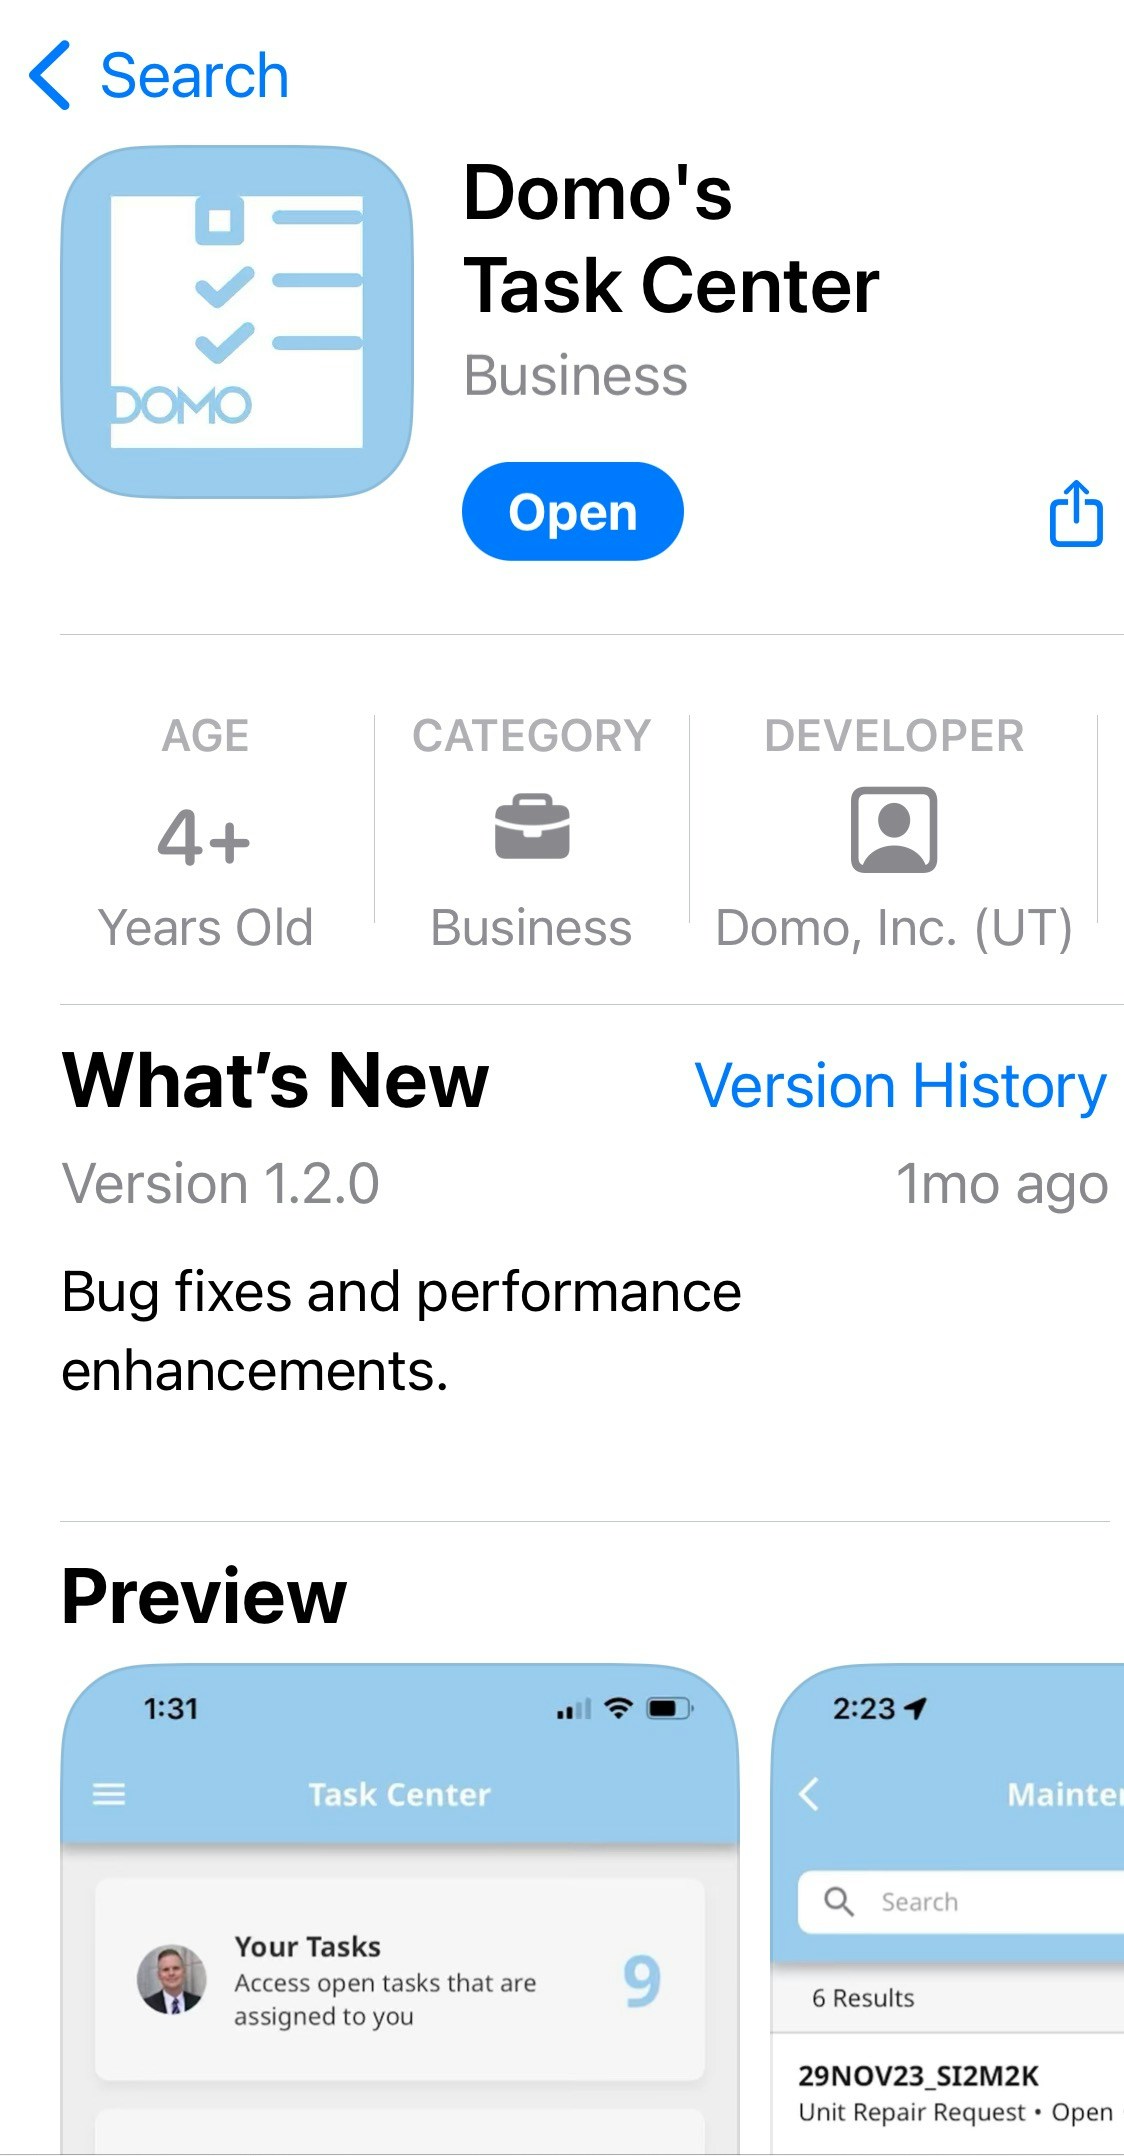
Tip: Learn how to interact with the Queues and Tasks API  in the dev portal.
in the dev portal.- Required grants
- Access Task Center
- View your tasks
- View open tasks
- View active queues
- View tasks in the task list
Required Grants
The following grants give user-specific rights to Task Center in your Domo instance:- Create Task Queues — This grant allows you to create new task queues and add them to your Domo workflows repository.
- Manage Task Queues — This grant allows you to take any action on any queue in your Domo instance, including giving yourself or others any permission to a queue. Give this grant to superusers, admins, or anyone who helps manage queues.
Access Task Center
Access Task Center from the Domo main navigation by selecting More > Task Center to open the Task Center home page. If Task Center does not appear as an option, contact your Domo account team for assistance.
Live Updates— By default, live updates are turned on at the top of the Task Center home page, and happen in near real-time. If you turn off live updates, you must refresh the page to see the updated task counts.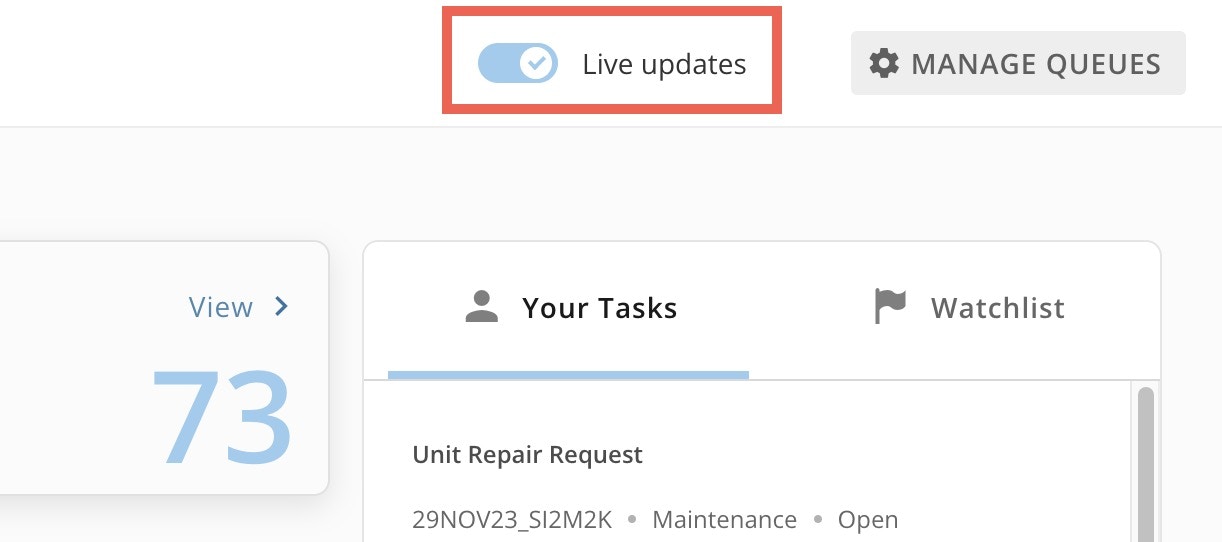
View Your Tasks
Inside Task Center, the Your Tasks tile shows a count of all the tasks assigned to you in any queue that have an open status. Learn more about task status.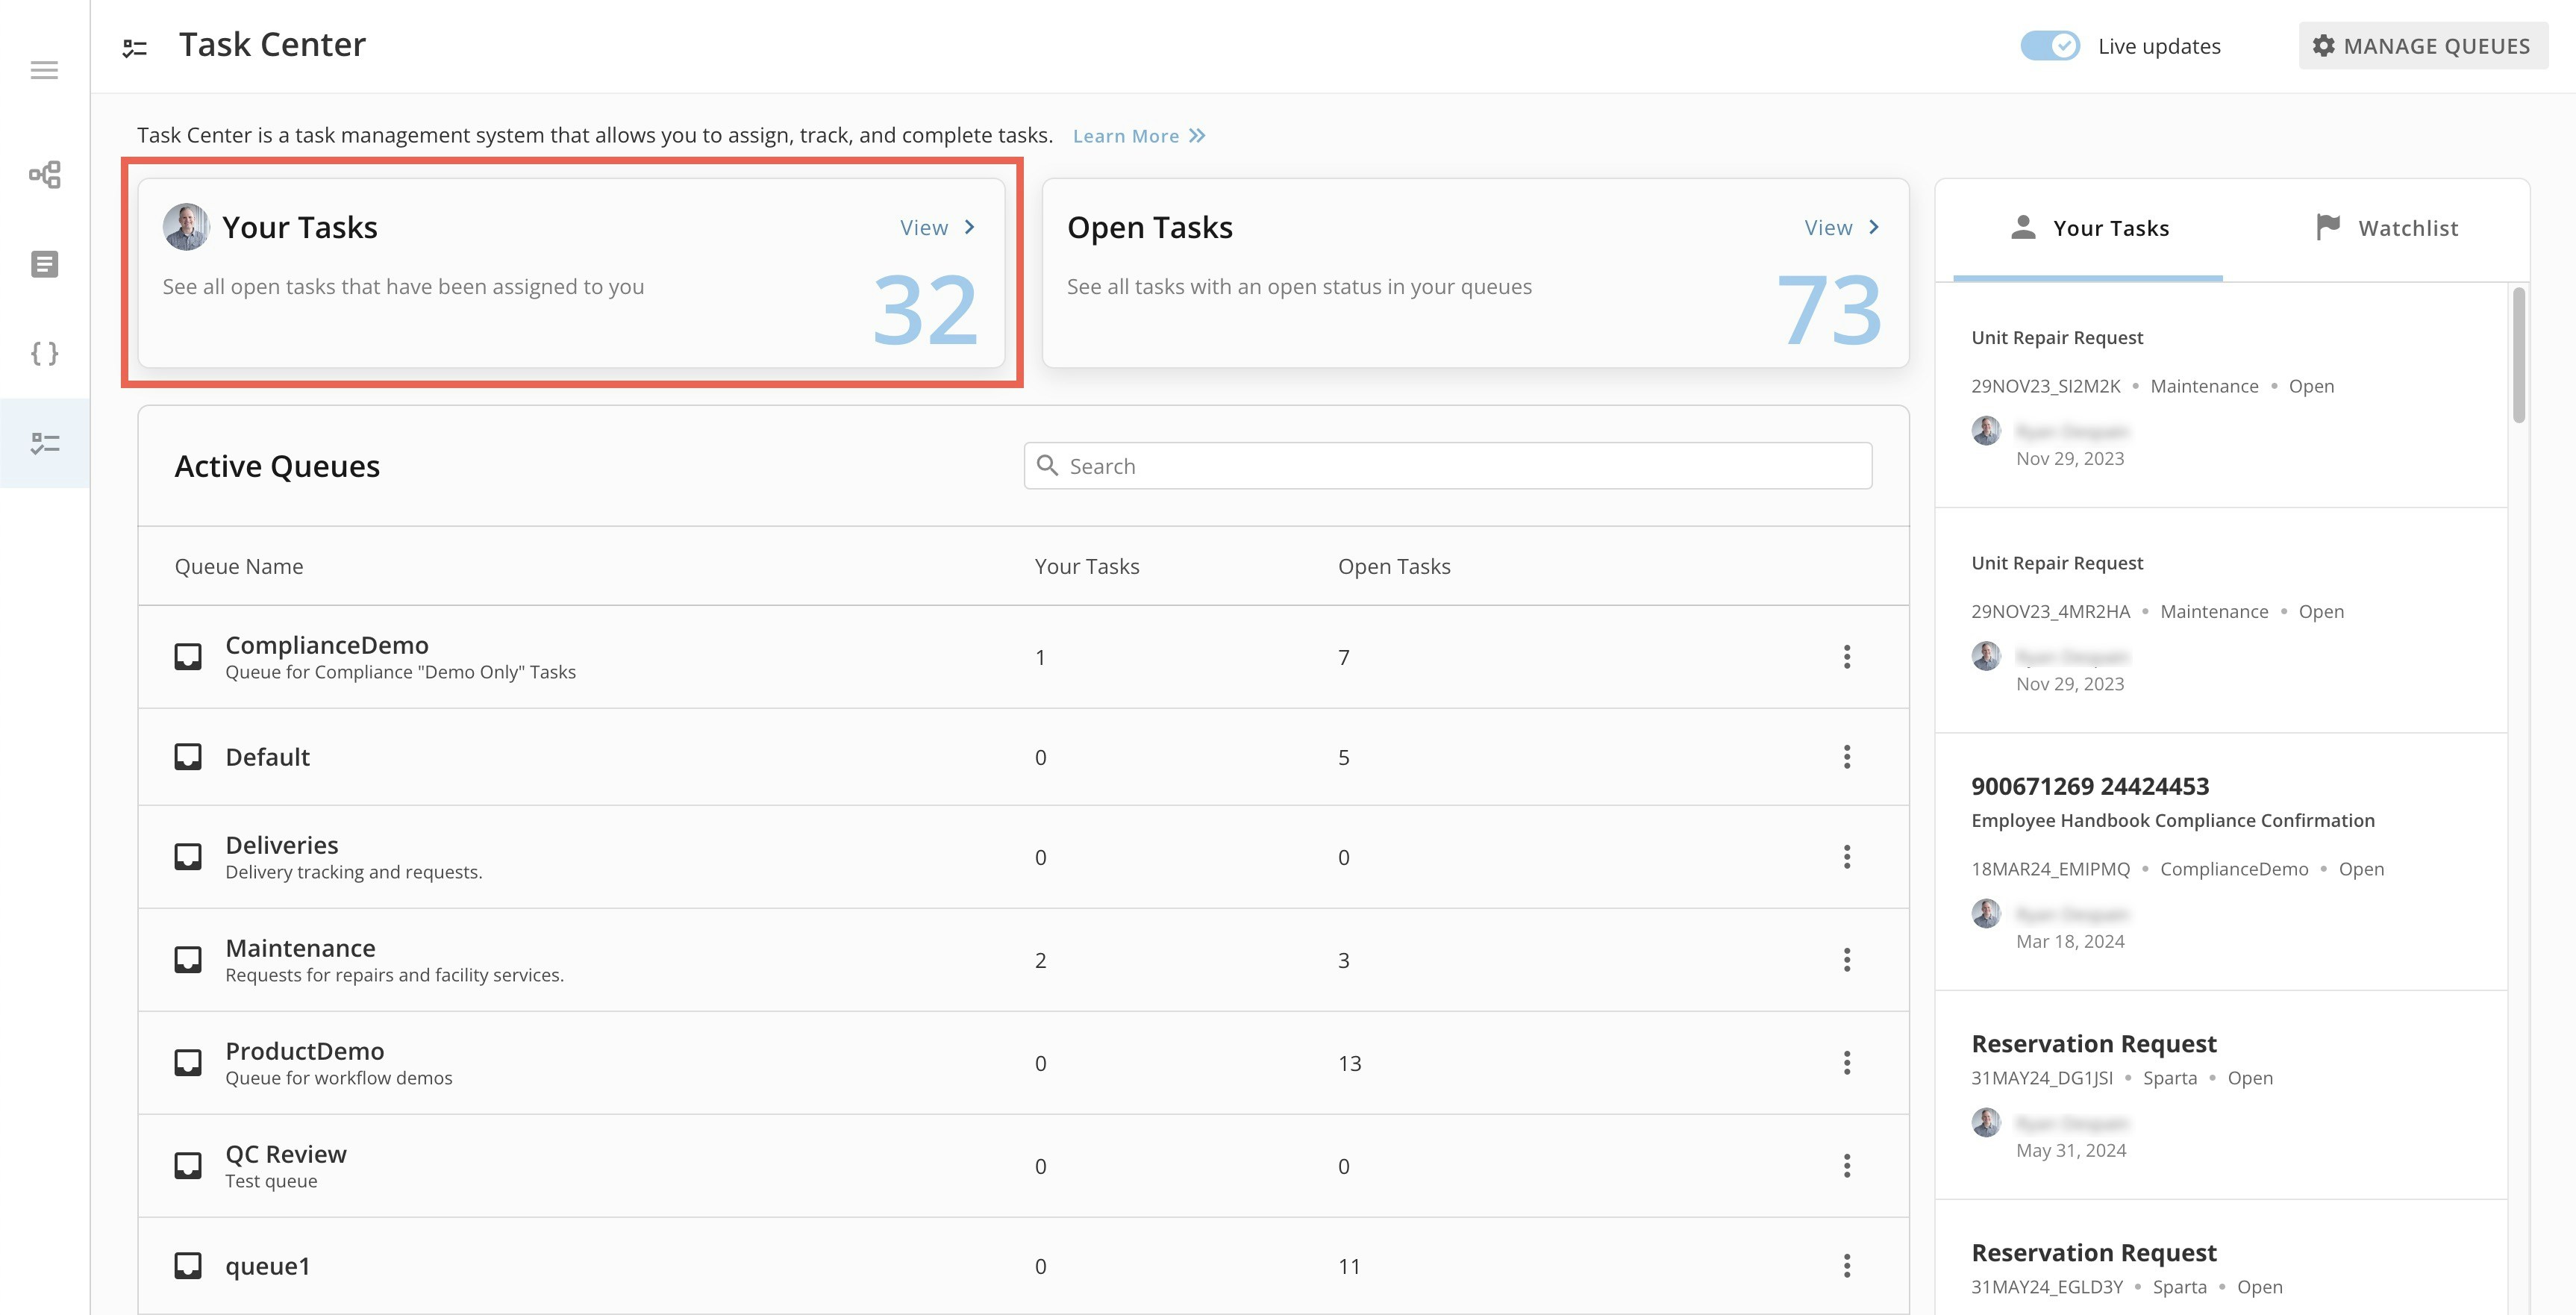

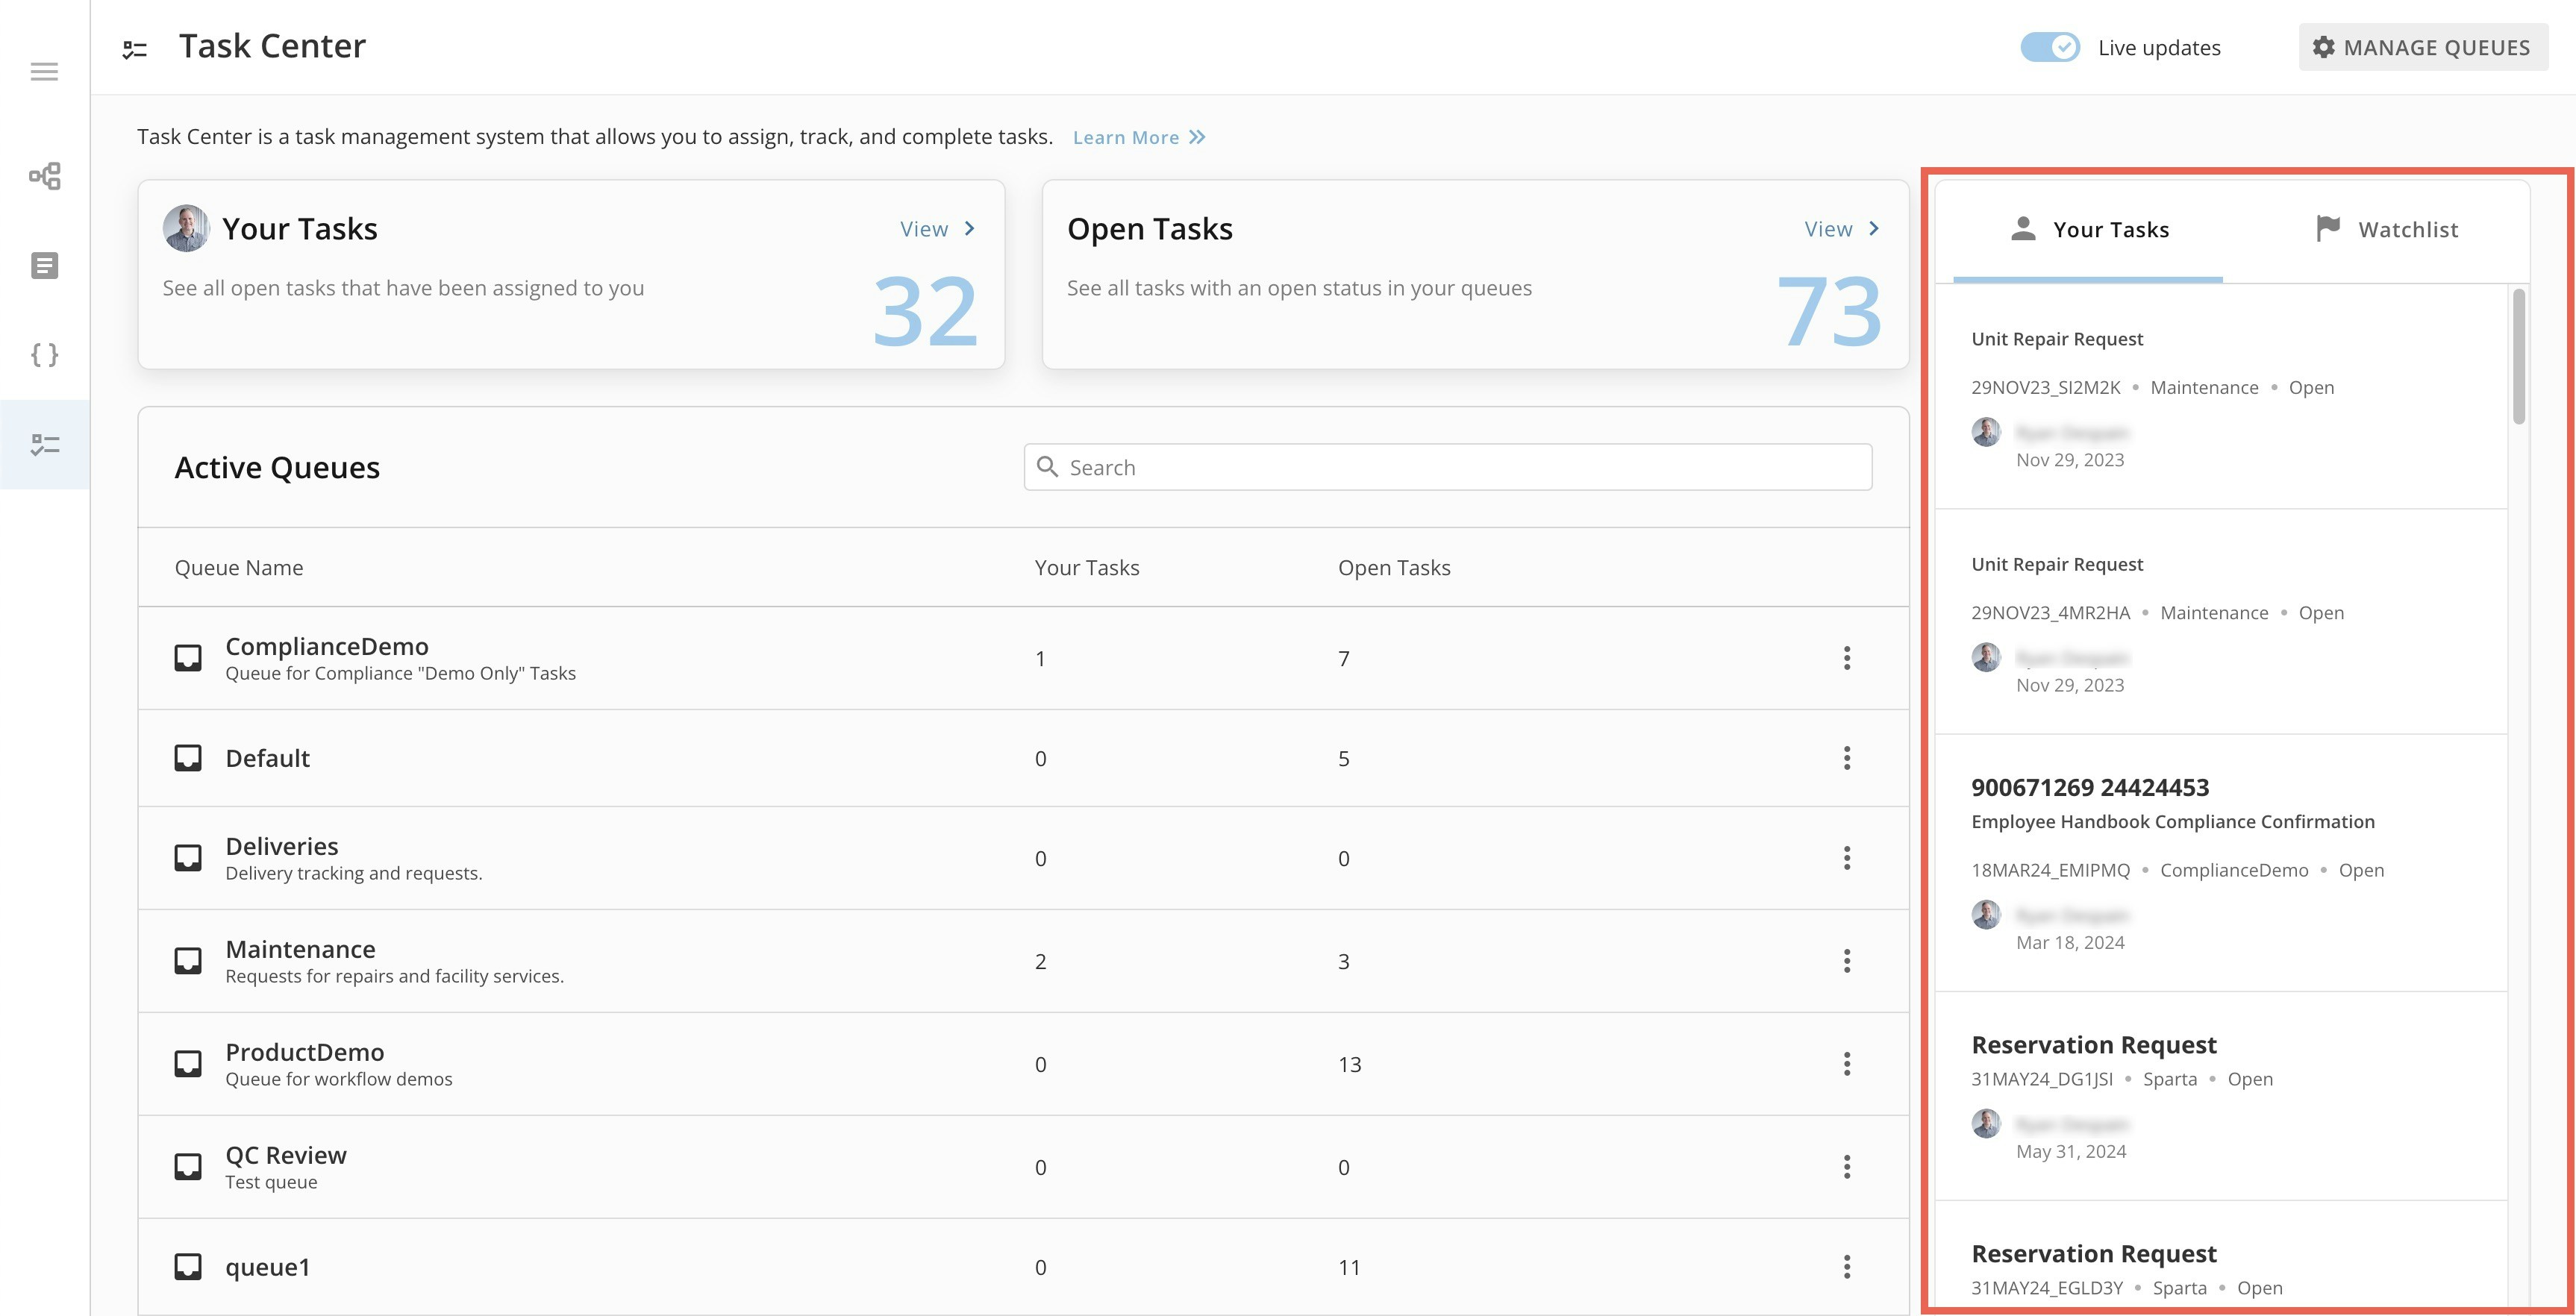
View Open Tasks
On the Task Center home page, the Open Tasks tile shows a count of all tasks in the queues you have access to that have an open status. Learn more about task status.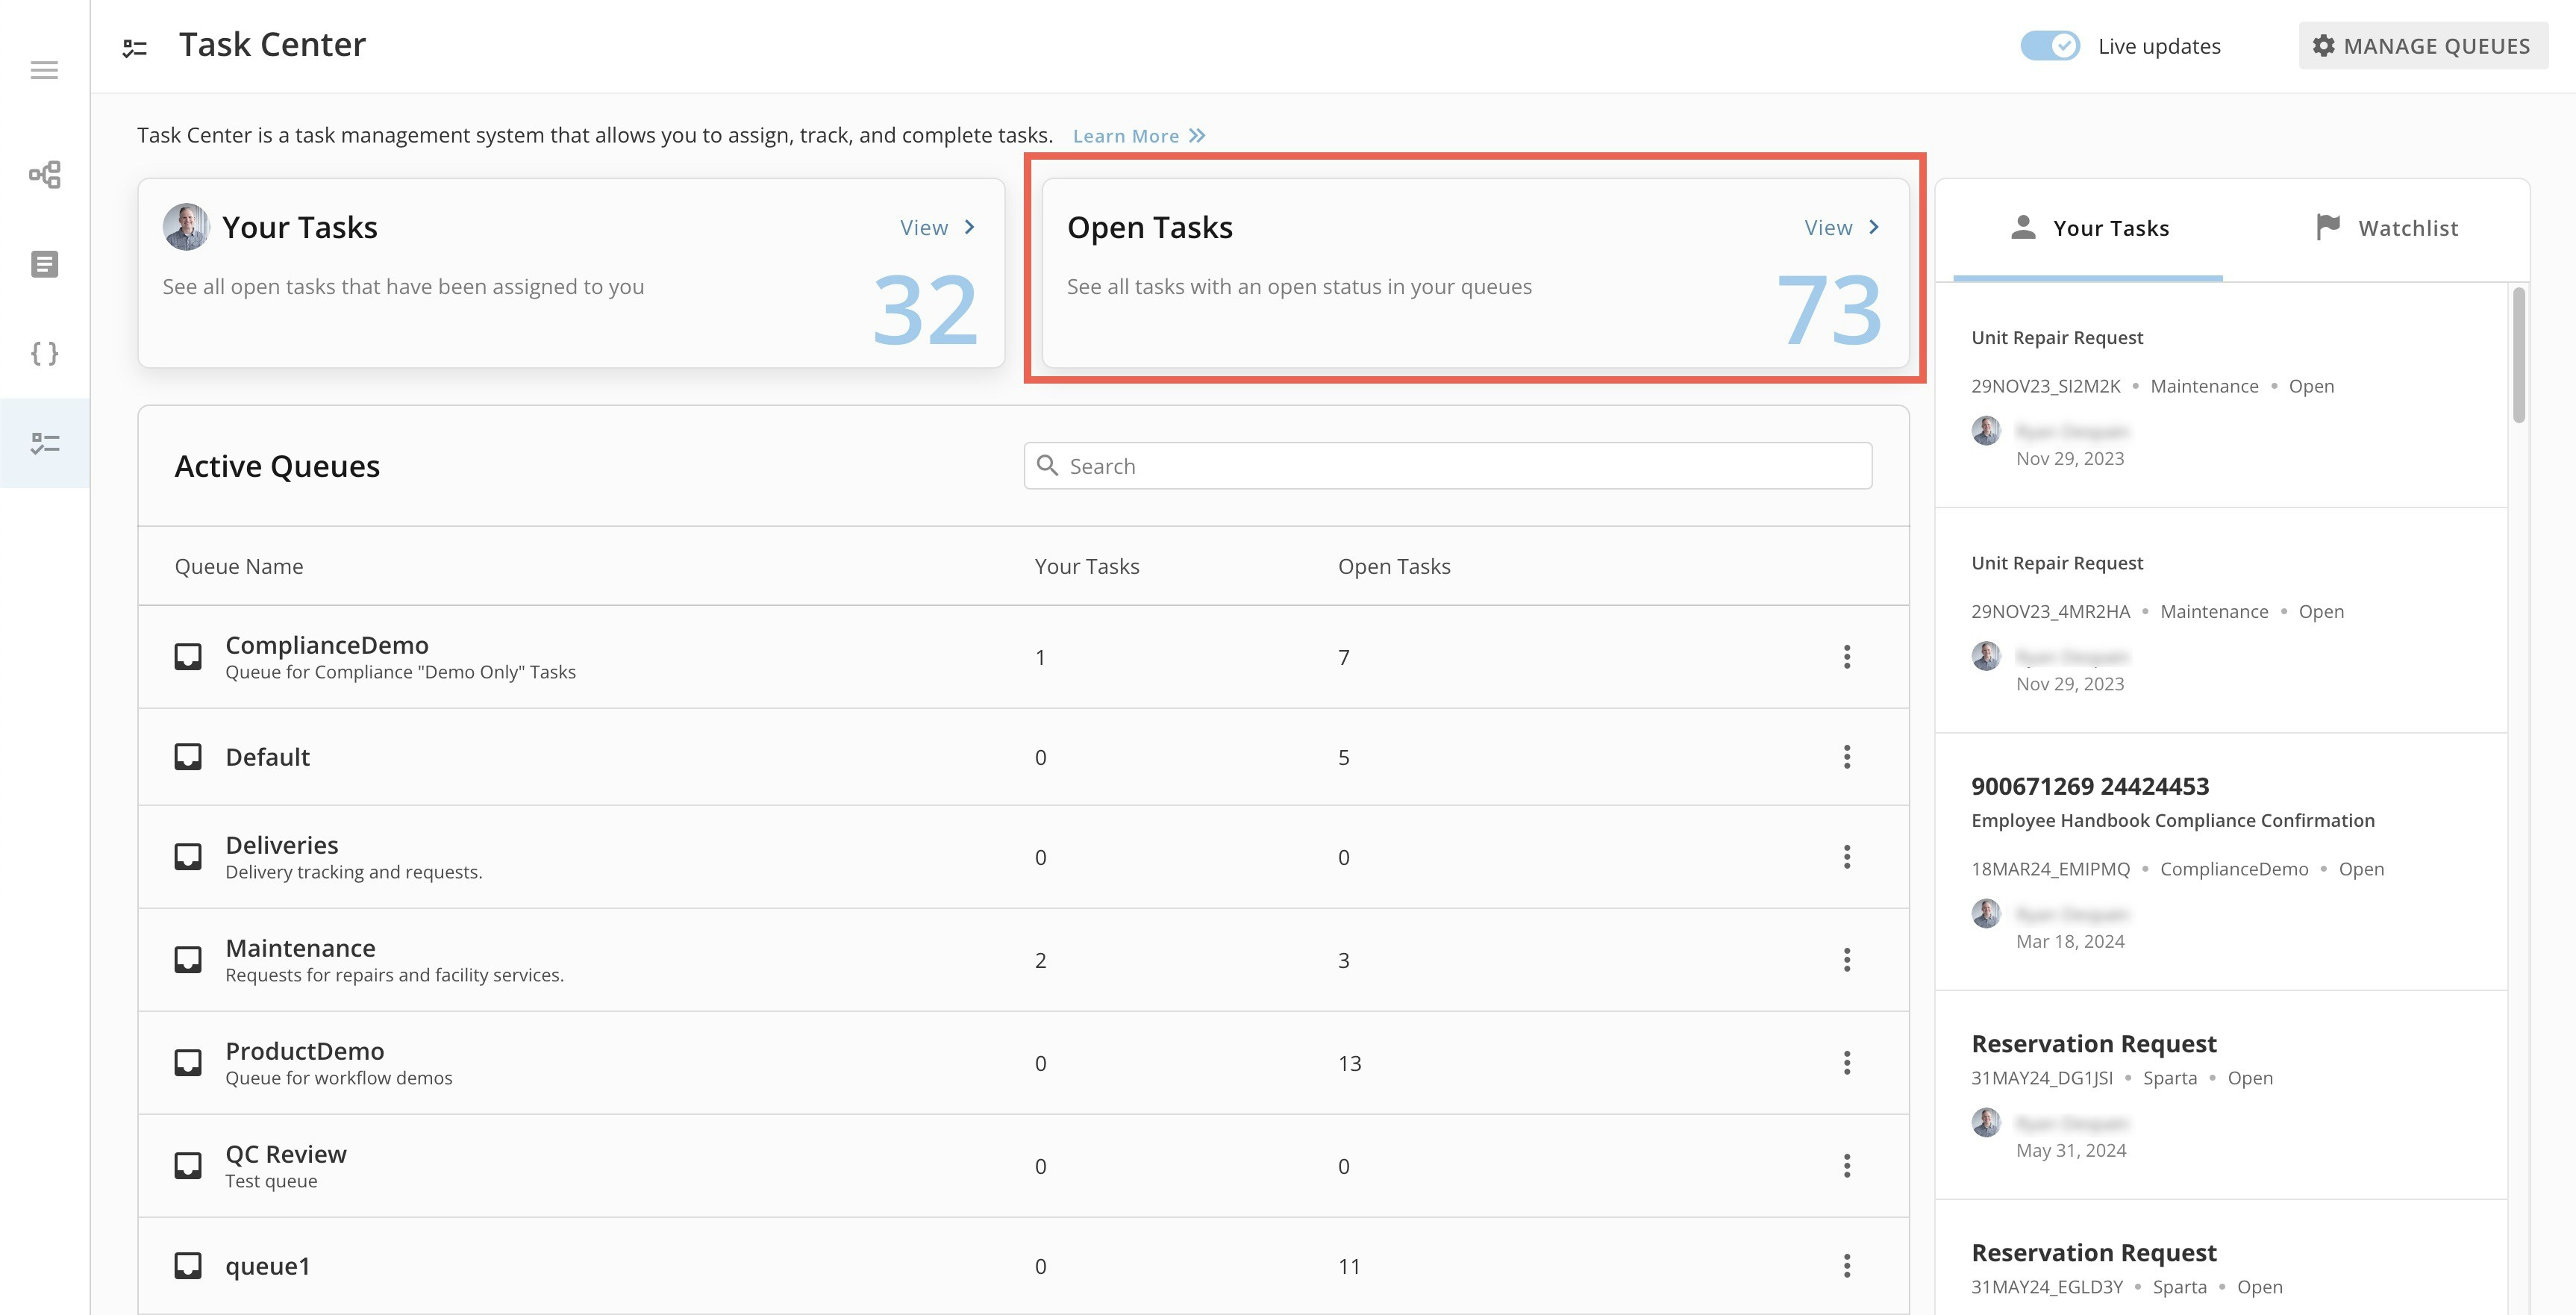

View Active Queues
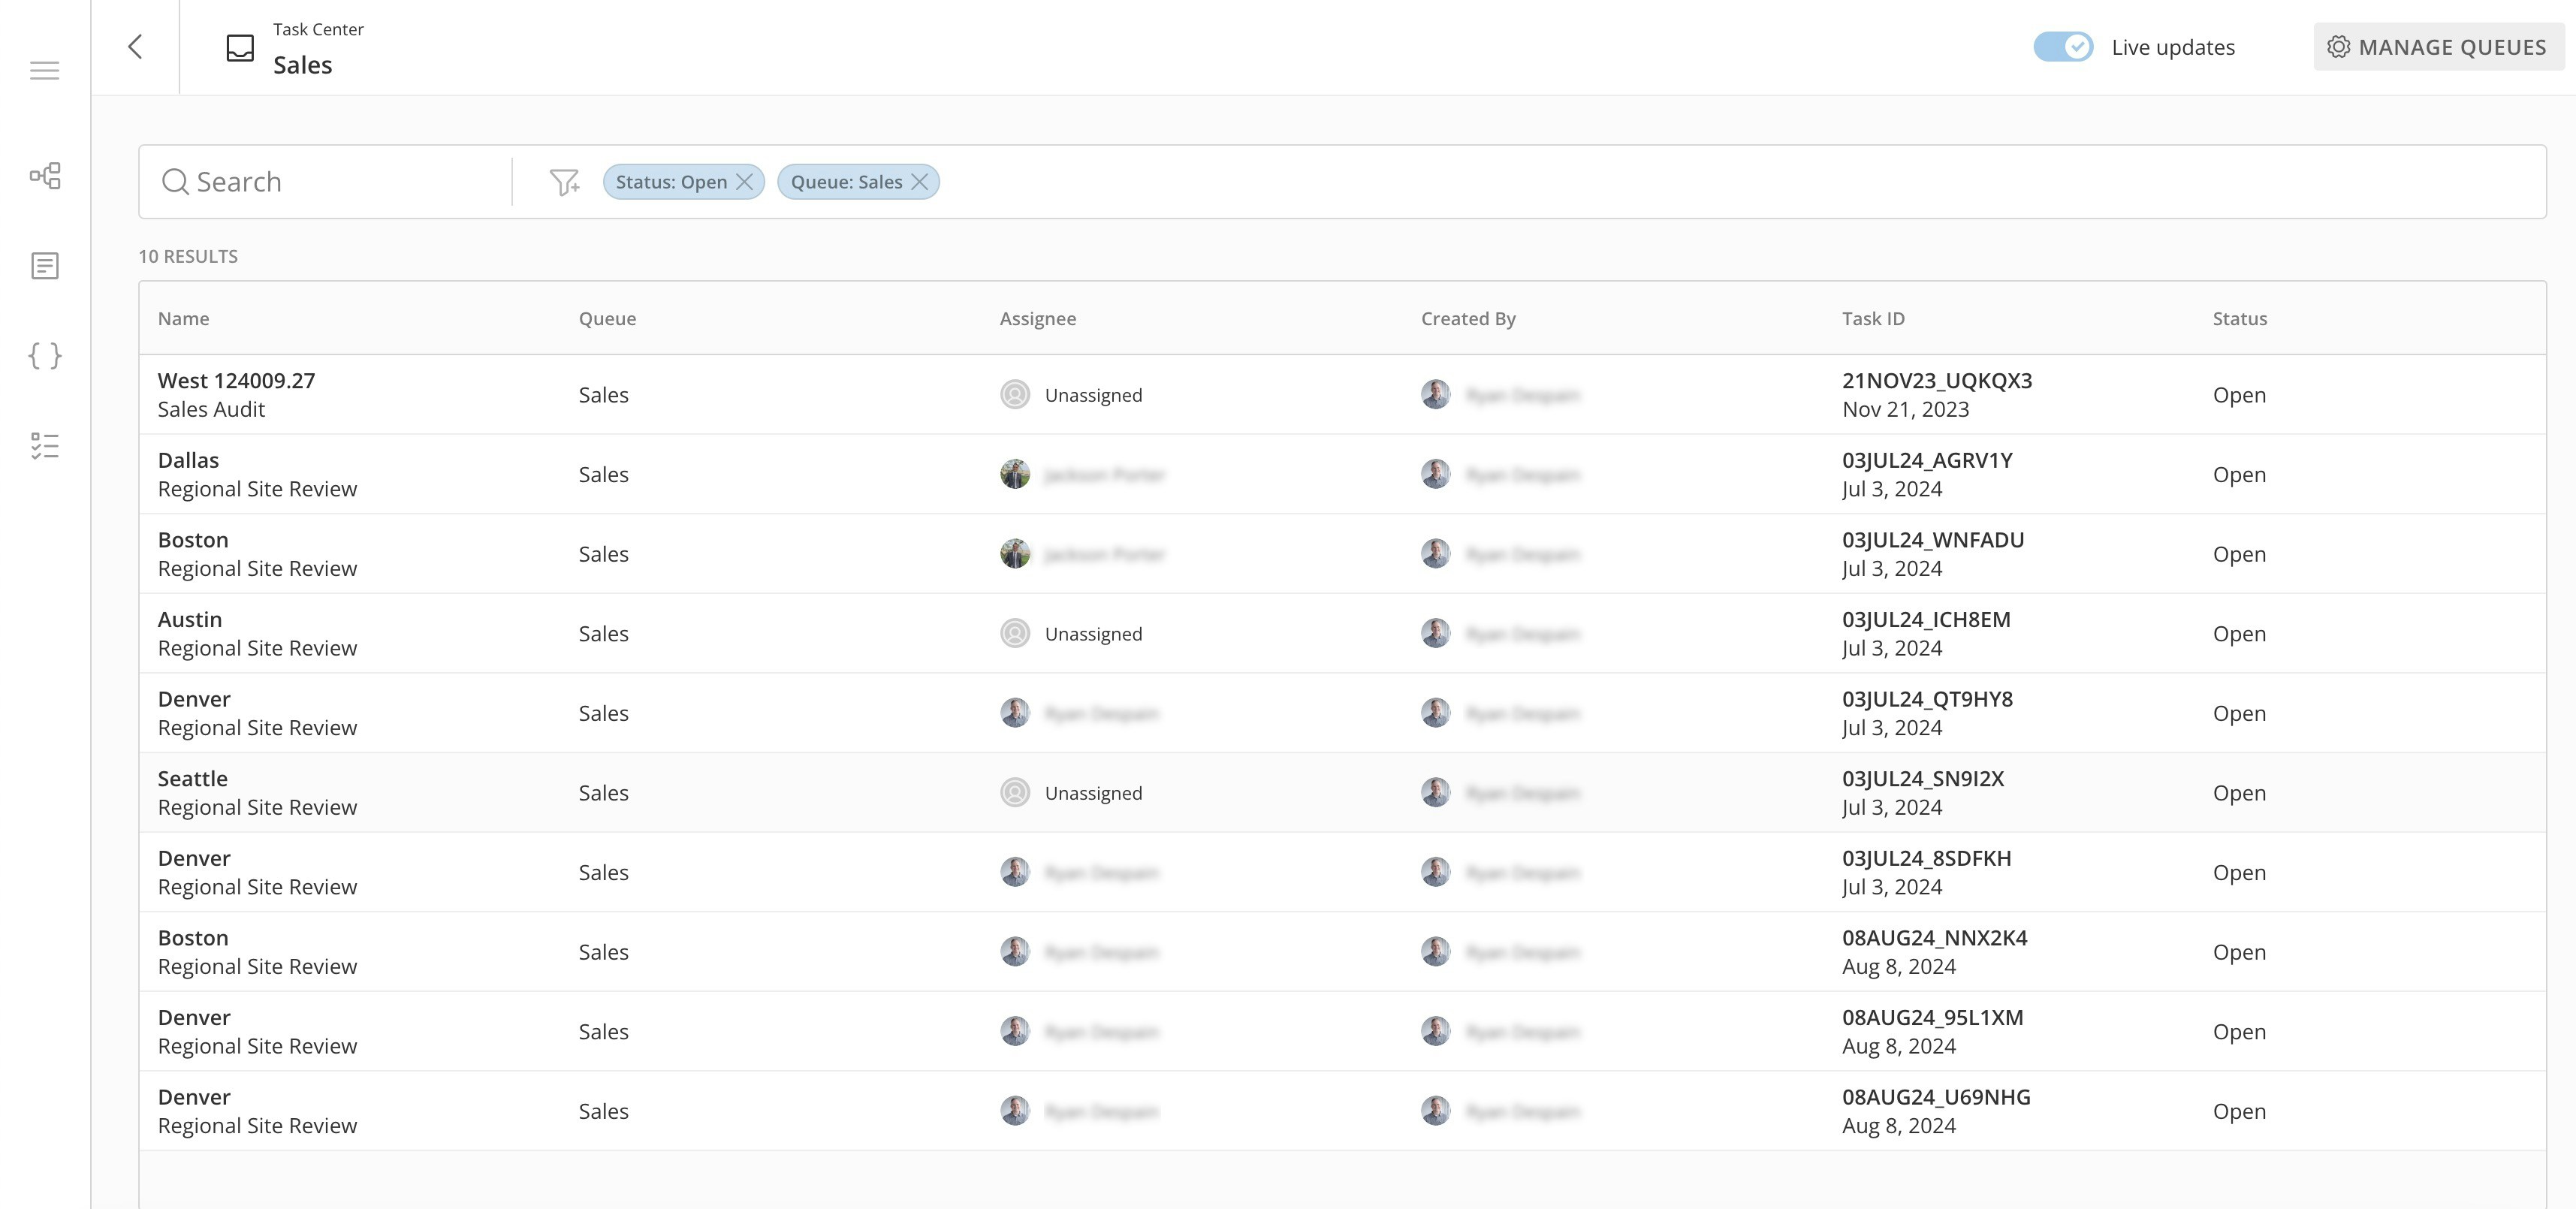
The Active Queues list includes all queues that you have access to, and displays counts for your tasks and all open tasks in each queue.
Open tasks. In this example, the queue is Sales. Learn more about the Task List.
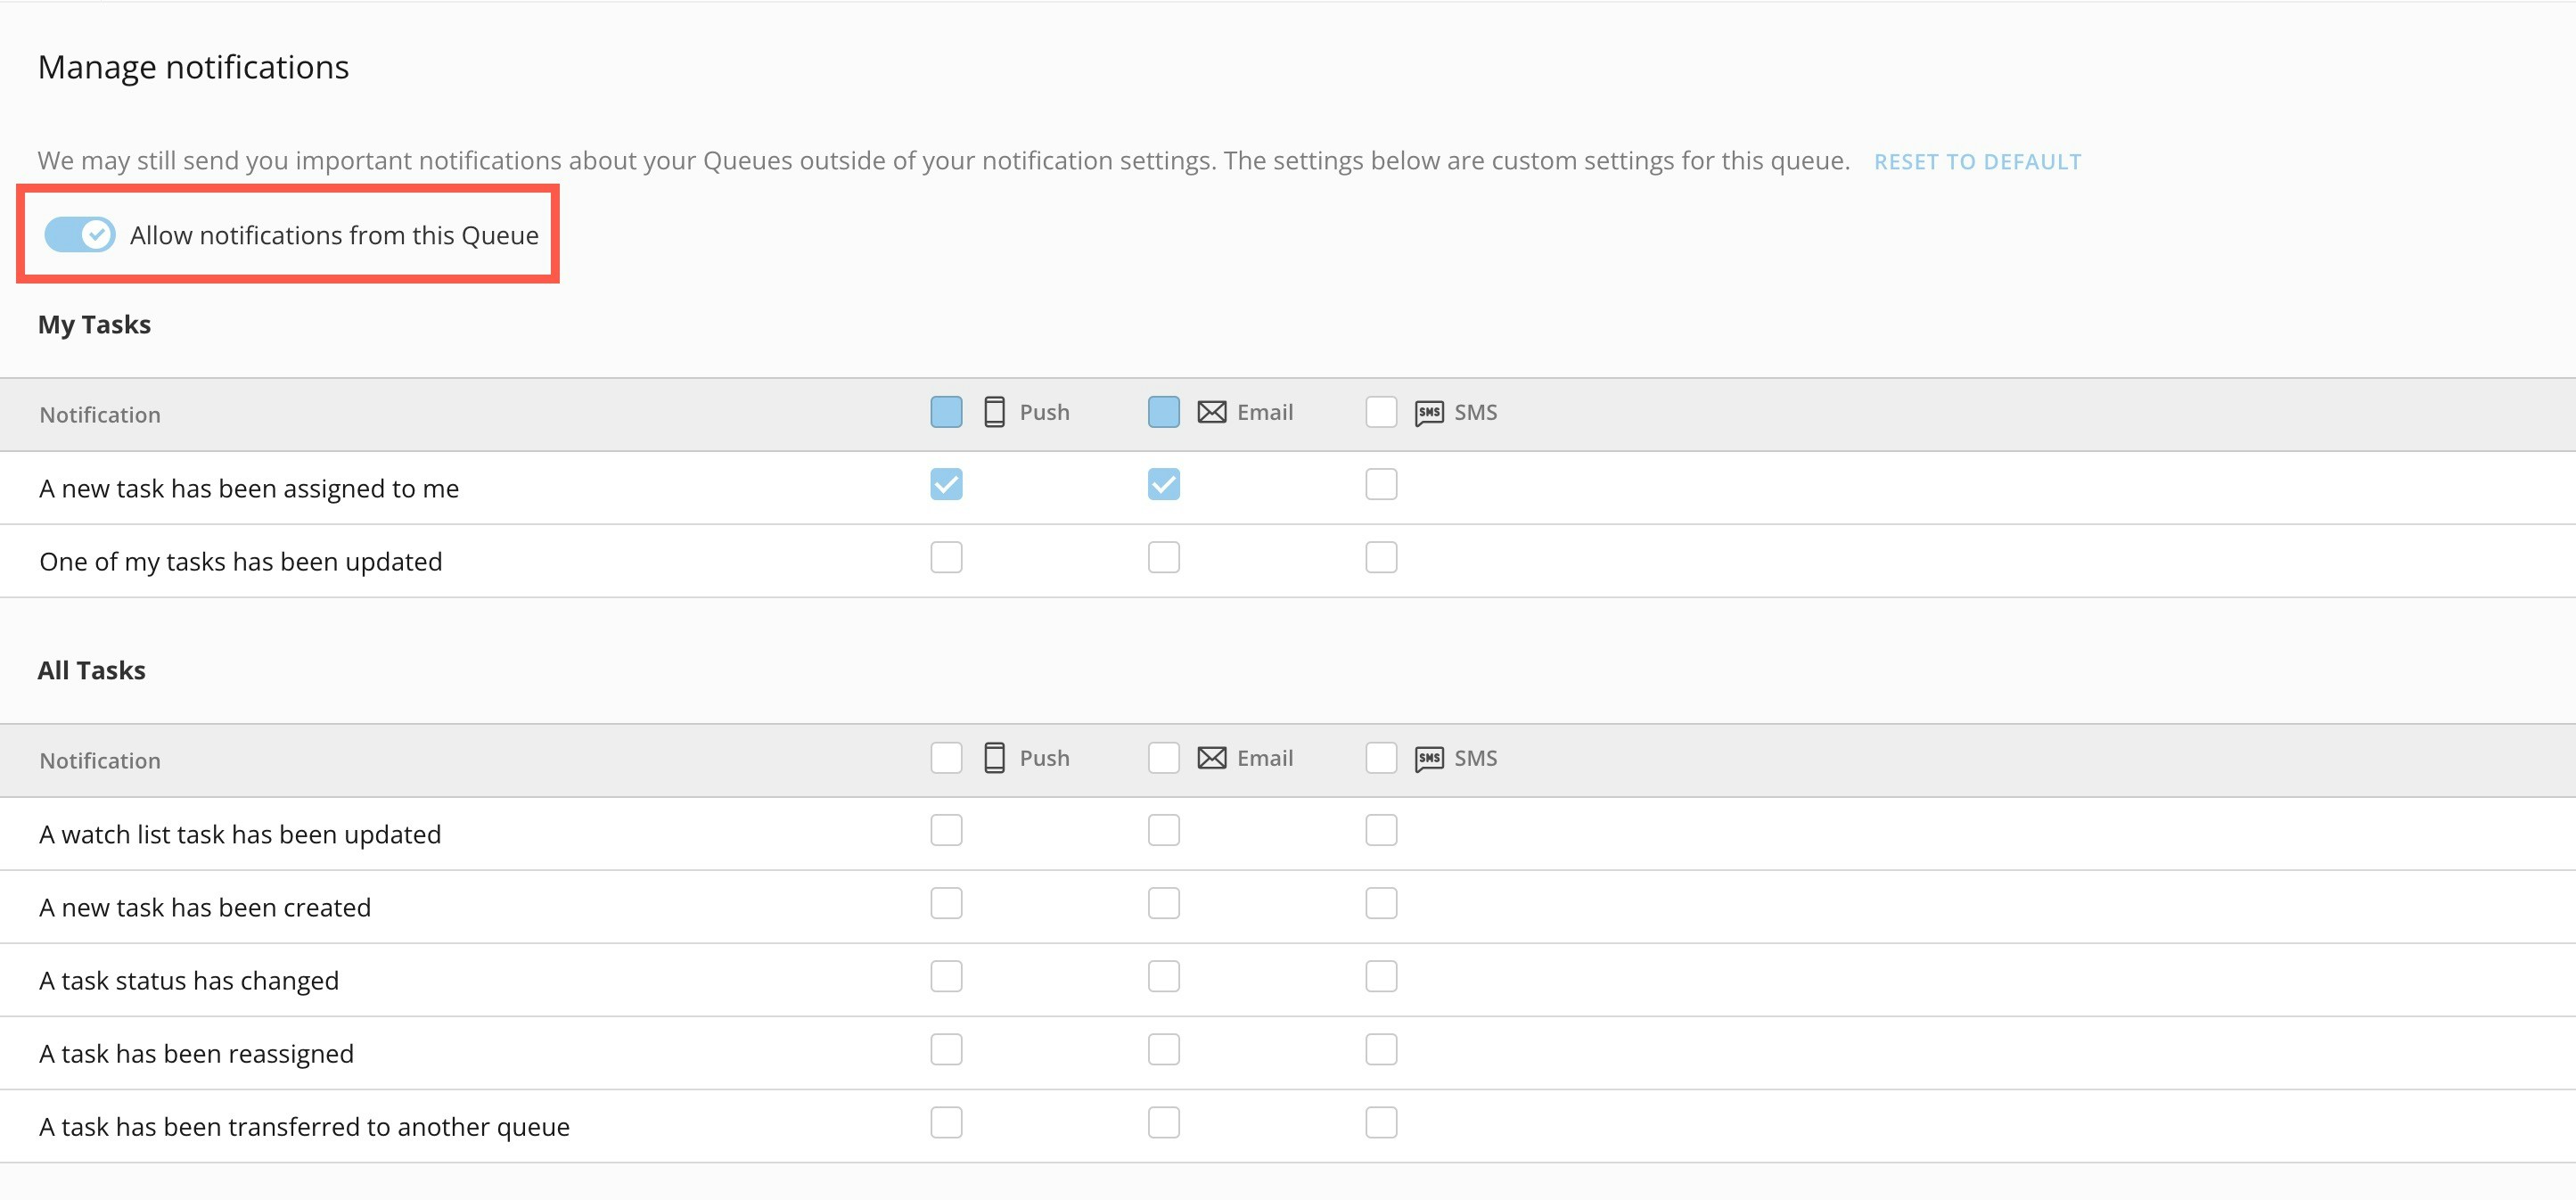
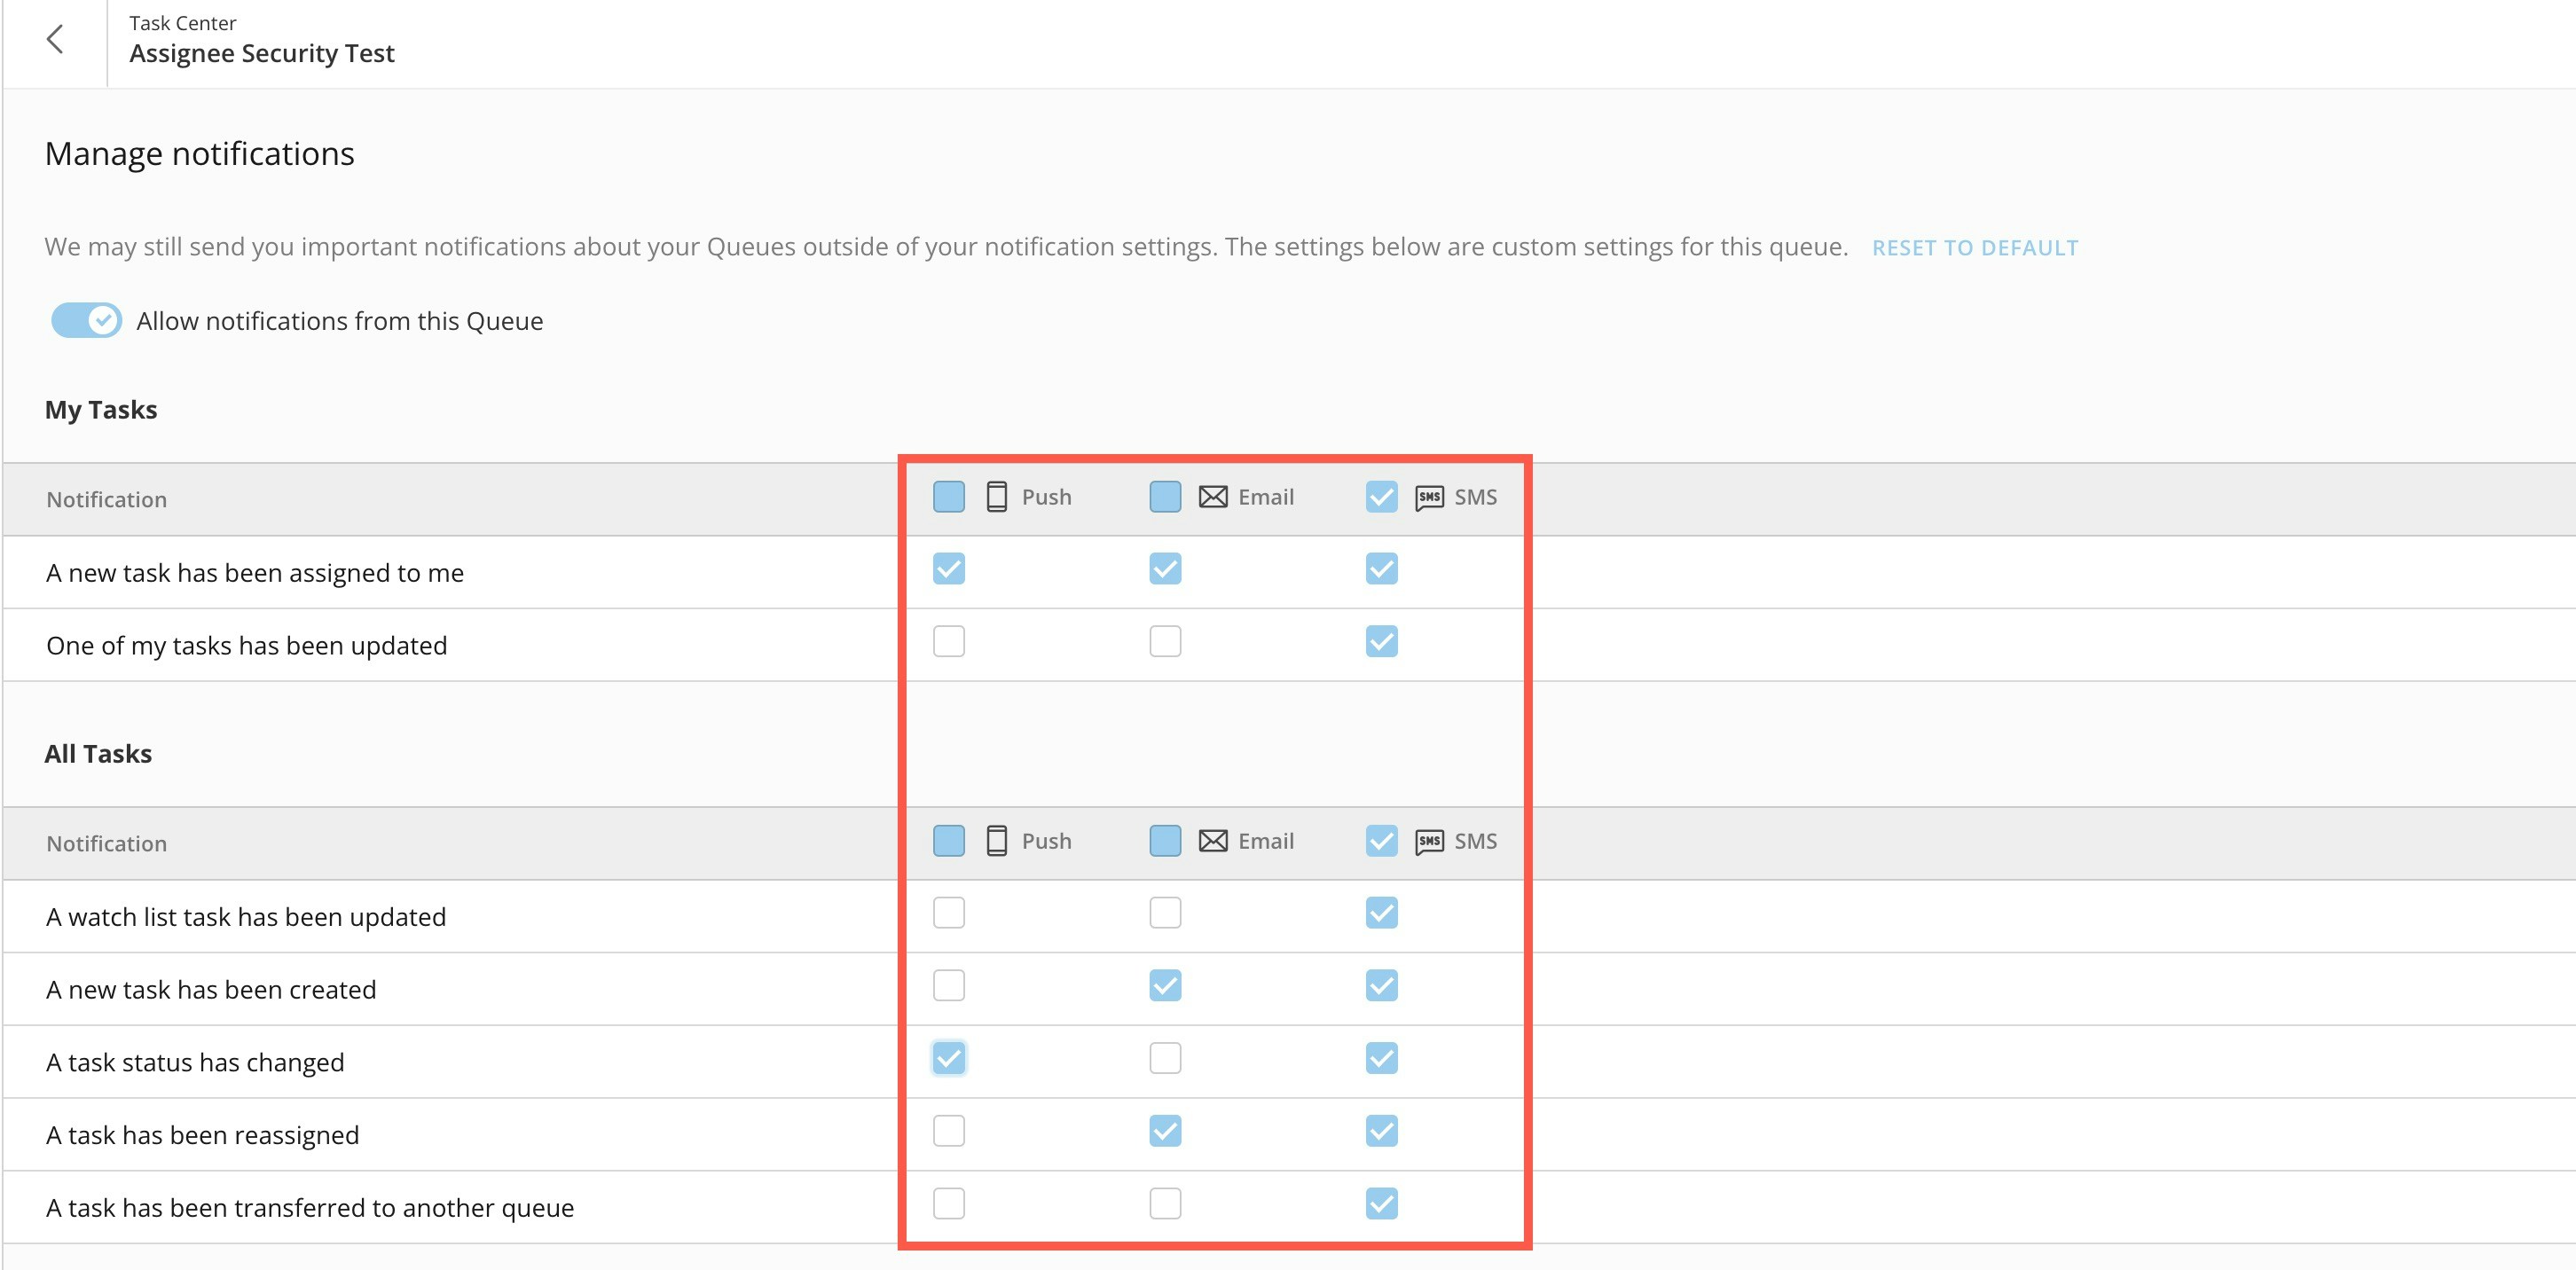
Manage Notifications
You can receive near real-time notification of the events you want to know about happening in your queues. If a queue is archived, notifications are discontinued. Learn how to archive a queue. Follow these steps to access the notification settings for your queues:-
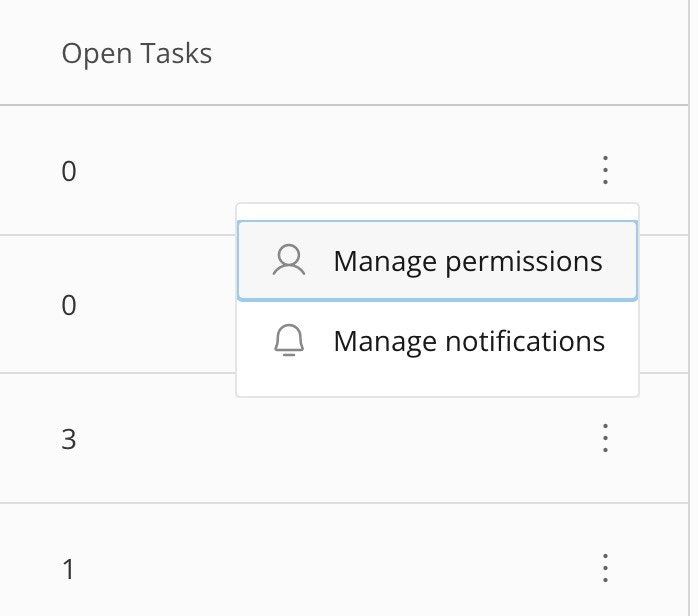
In the Active Queues list of Task Center, select
 action menu
(three vertical dots icon) > Manage notifications.
action menu
(three vertical dots icon) > Manage notifications.
-
On the Manage notifications page, toggle Allow notifications from this Queue. If this switch is not toggled, none of your configured notifications will be sent.
-
Select which notifications for your tasks and which notifications for all tasks you want to receive and by what method—push notification to your mobile device, email, or SMS.
Manage Permissions
Those with Share permission to a queue can give others permission to it up to their level of access from the Active Queues list. Admins can share access to a queue from inside the Manage Queues interface by following the same steps. Follow these steps to manage queue permissions (according to your own permissions):-
In the Active Queues list or from the Manage Queues interface (admins), select More
(three vertical dots icon) > Manage permissions.
The permissions modal displays.
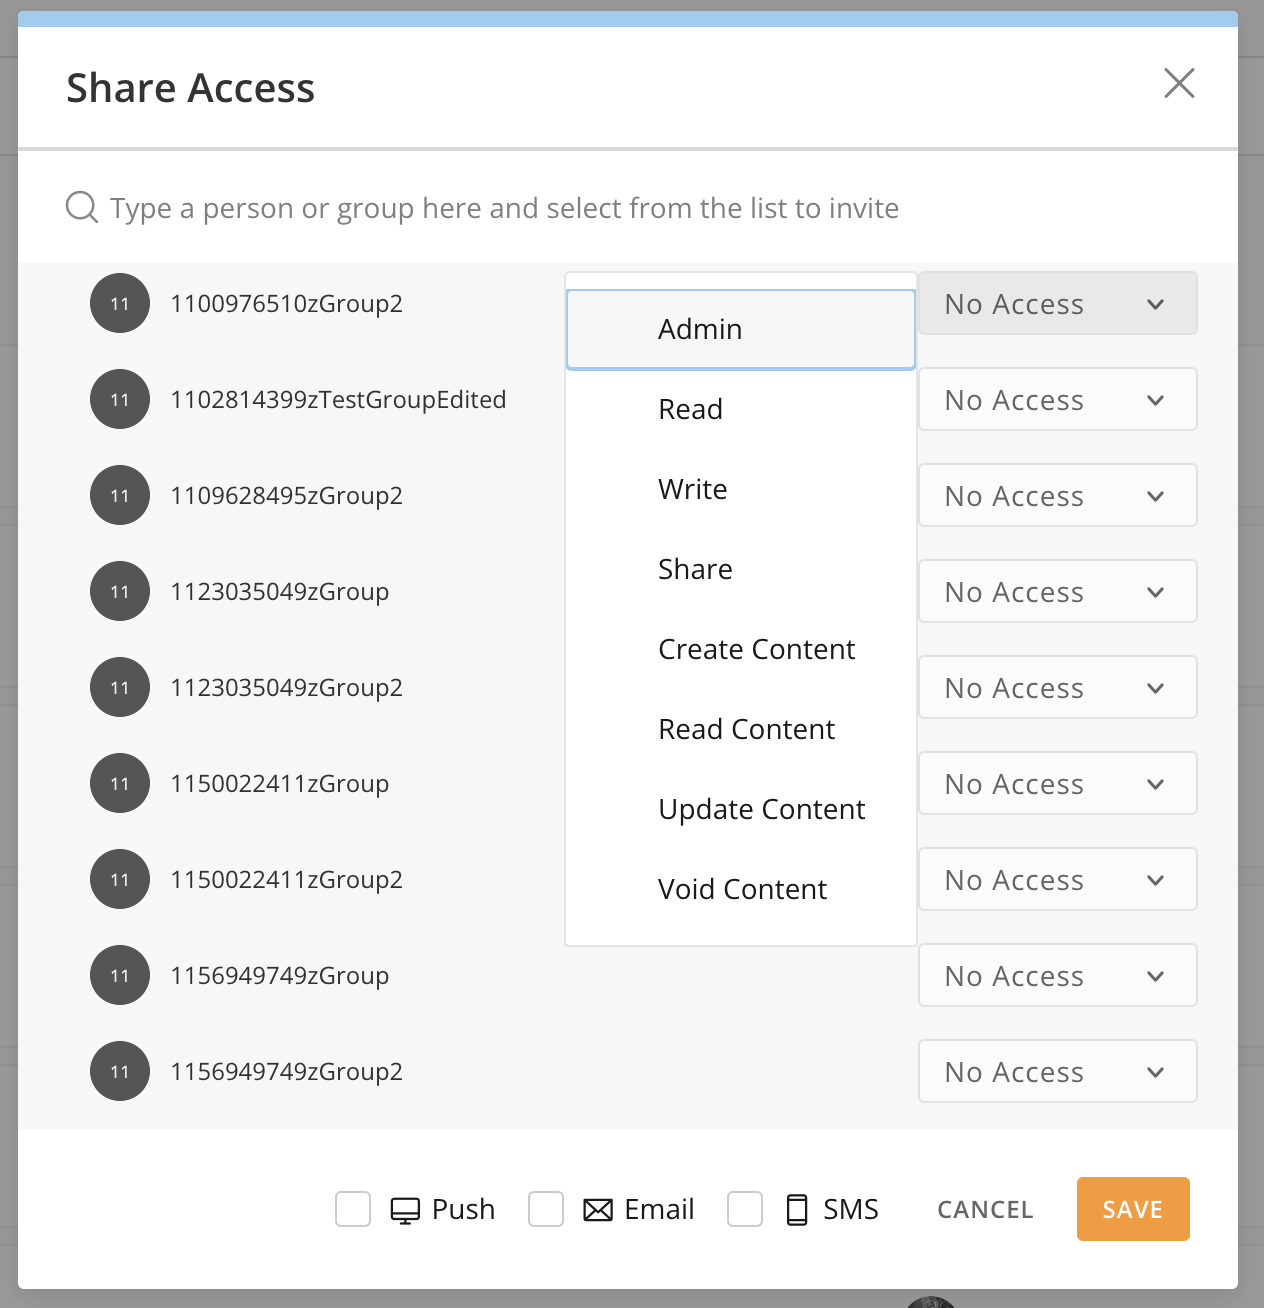
- In the modal, search for the user(s) or groups(s) whose access you want to update and use the dropdowns to choose the level of access. Non-admins with Share permission to the queue can only share access up to their own level. The following list describes the access levels:
- Admin — Allows a user to perform any action on a specific queue or task in that queue
- Read — Allows a user view-only access to queue settings in Queue Manager
- Write — Allows a user to edit a queue
- Share — Allows a user to grant another user equal or lesser access to a queue
- Create Content — Allows a user to create a task to display in the queue
- Read Content — Allows a user view-only access to a task and the queue count
- Update Content — Allows a user to edit and submit a task
- Void Content — Allows a user to void a task, which prevents manual updates from occurring
View Tasks in the Task List
Whether you use the Your Tasks or Open Tasks tile or select a queue from the Active Queues list (all on the Task Center home page), you are taken to the Task List, which you can filter by status, task owner, associated form, and more. The Task List includes a Task ID or task identifier for each task. The task identifier is a tag or field from the originating form and includes the task creation date.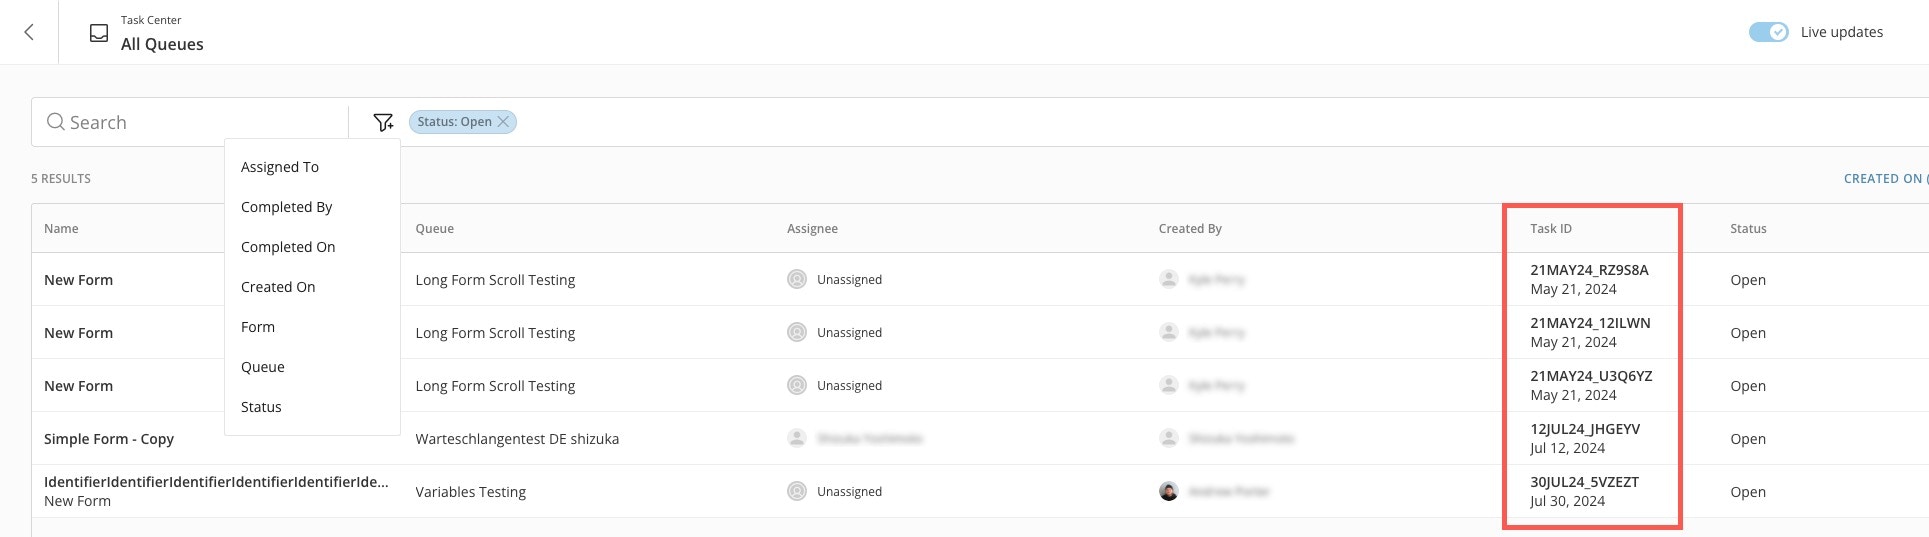
View Task Details
When you select a task from the Task List, the form associated with the task opens in the form viewer on the right side of the screen. The form viewer displays all the task information.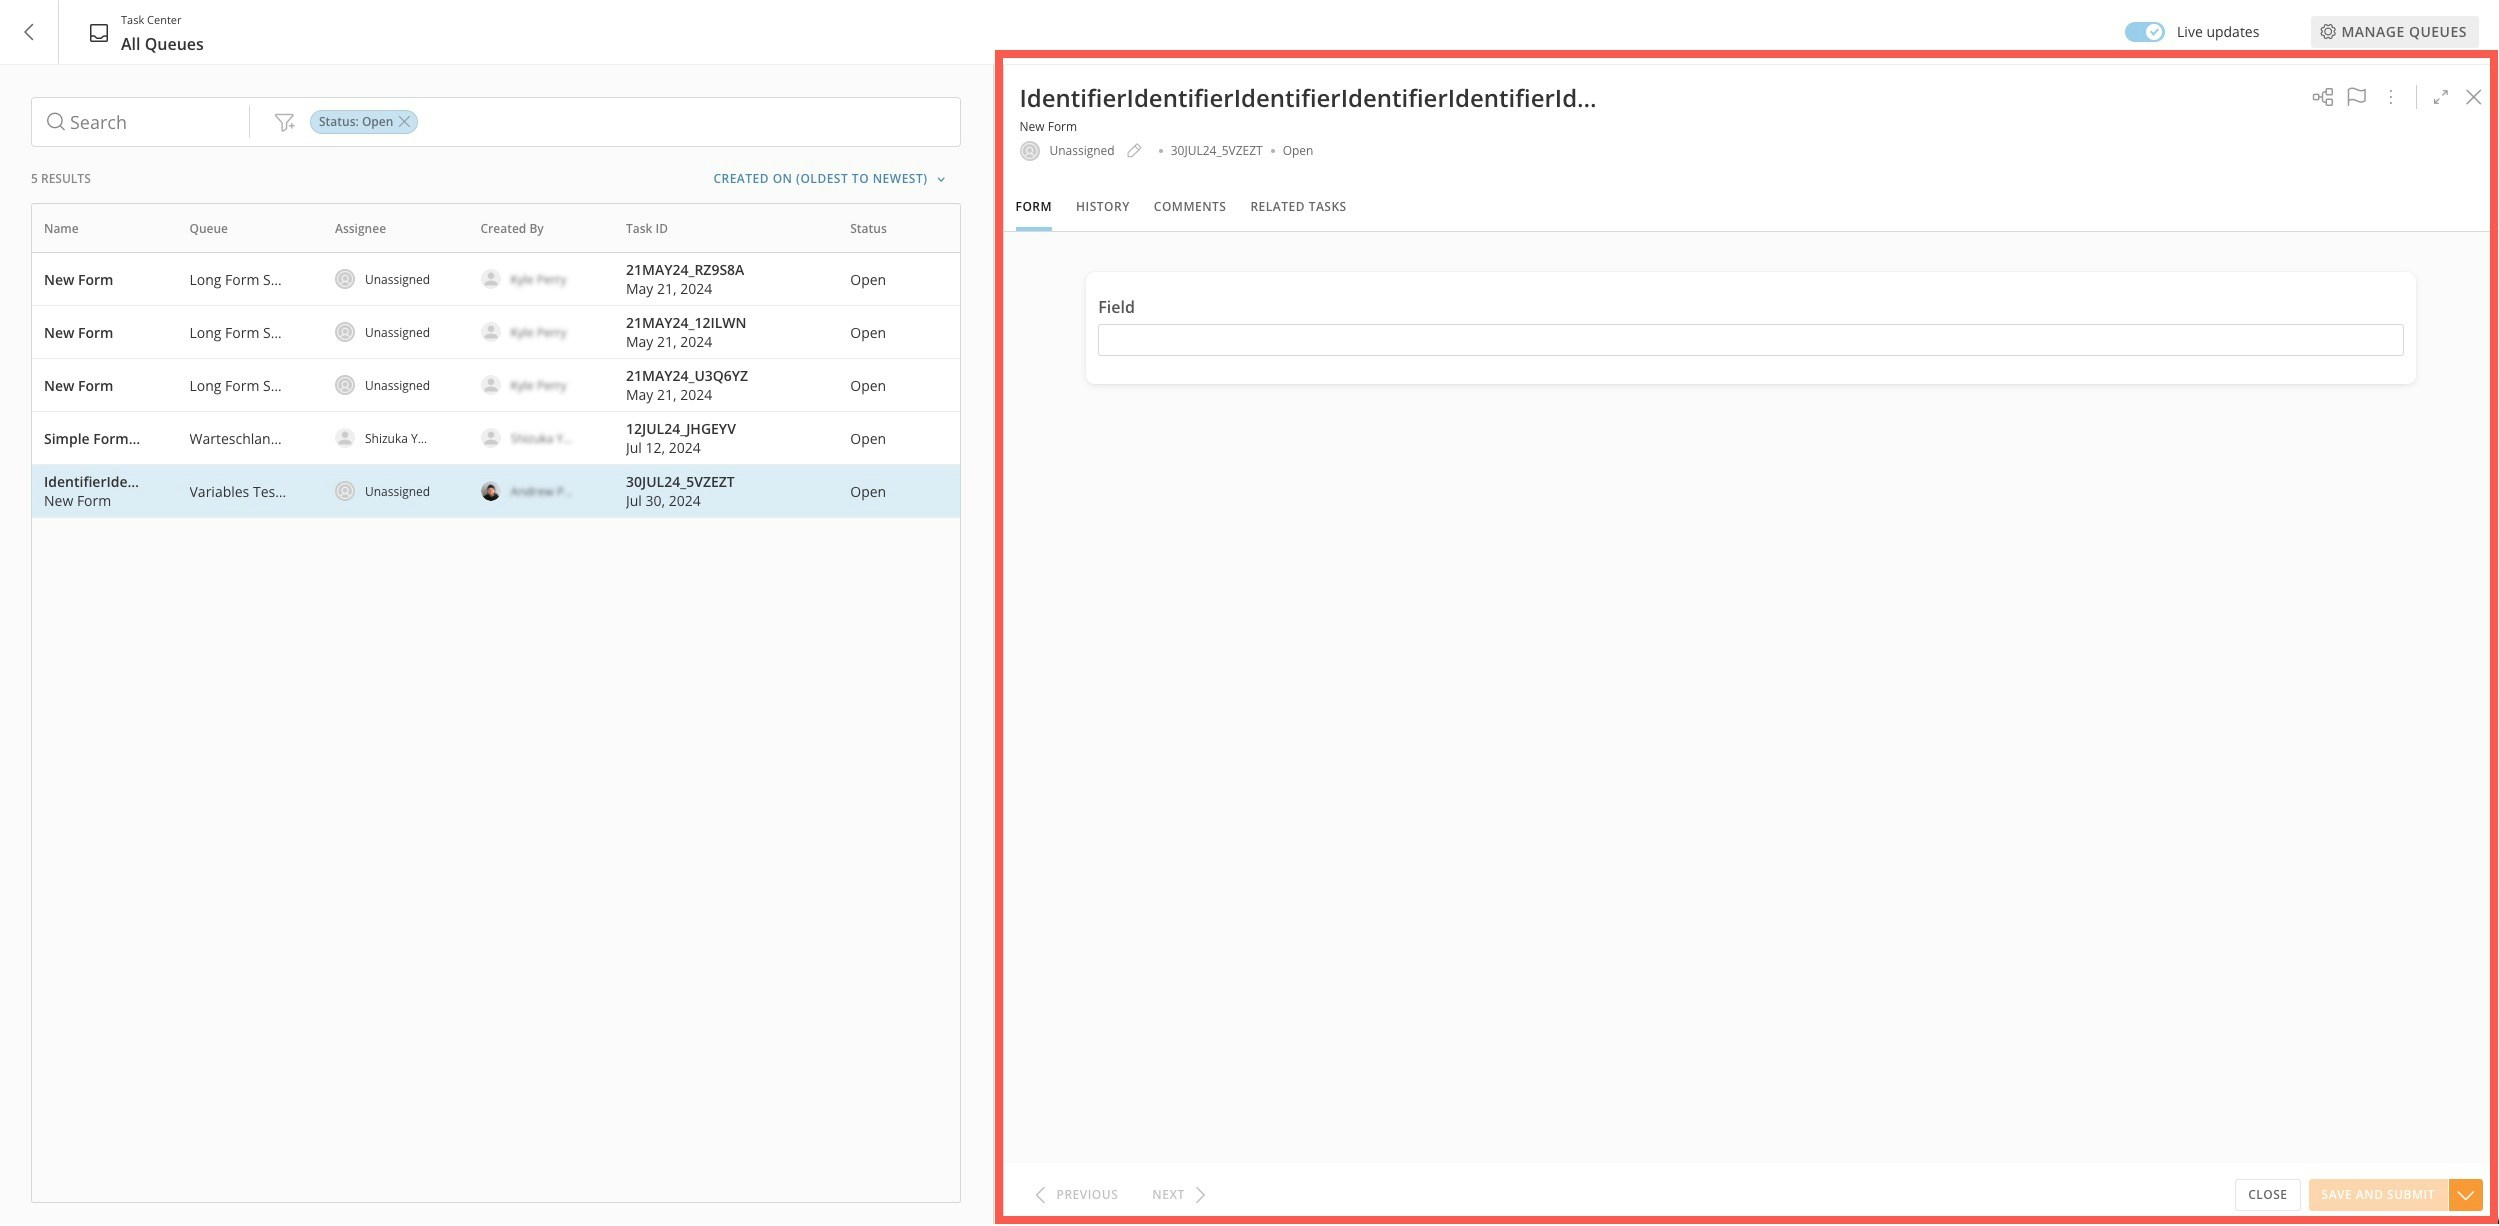
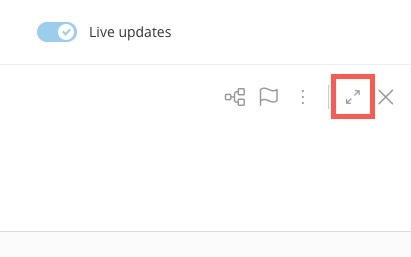
 Expand option to make the form viewer full screen.
- Open — All tasks have an Open status when they are created by a workflow. Anyone with Update Content access to a queue can update an Open task in that queue, regardless of whether they are assigned to the task.
- Completed — You must submit a task for it to have a Completed status. After a task has been submitted and has a Completed status, you cannot edit it or change it back to an Open status.
-
Void — Only a user with Admin permission for the queue can apply the Void status to a task in that queue. A voided task means that you do not want to submit any data, and the associated workflow that created the task is placed in a failed state. After a task is voided, you cannot edit it or change it back to an Open status.
Go to Workflows — Select
 Workflows in the form viewer to open a new tab and review the workflow version where the task was created. You must have the View Execution List or Edit Execution Details to view the workflow version.
Assign/Reassign a Task
You can assign a task to a user by selecting Edit (pencil icon) in the Assignee field in the form viewer header.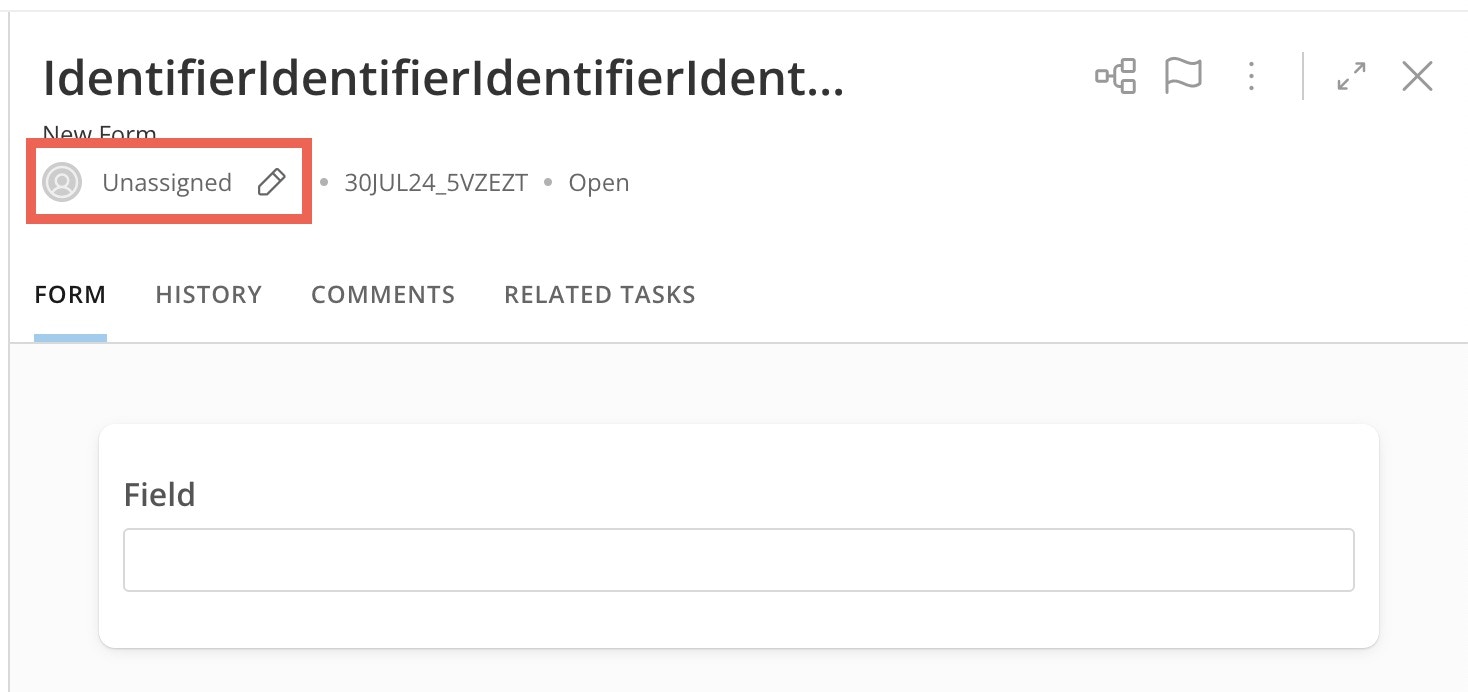
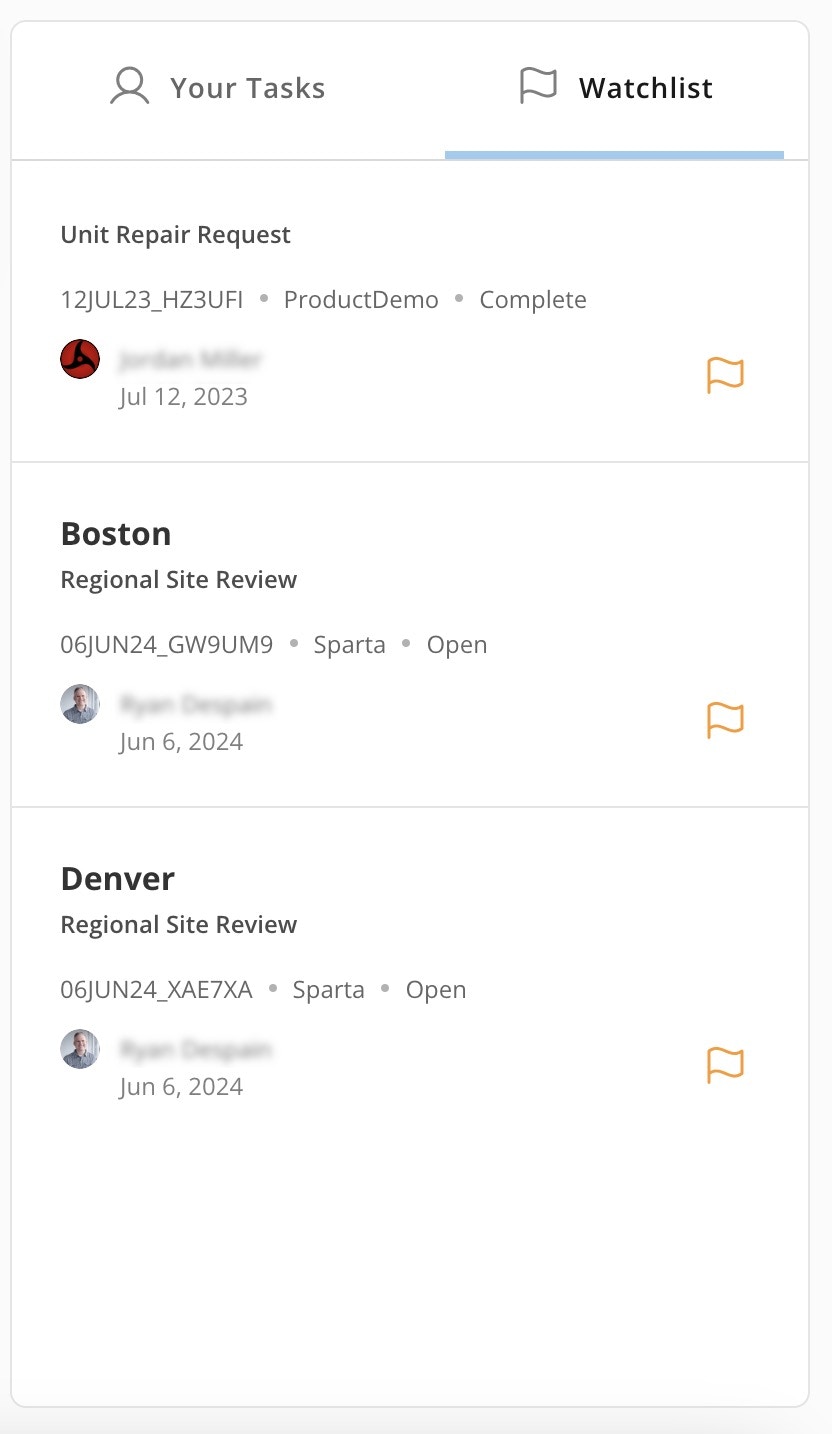
Add a Task to the Watchlist
The Watchlist tab on the Task Center home page allows you to monitor certain open tasks quickly, regardless of their assignee.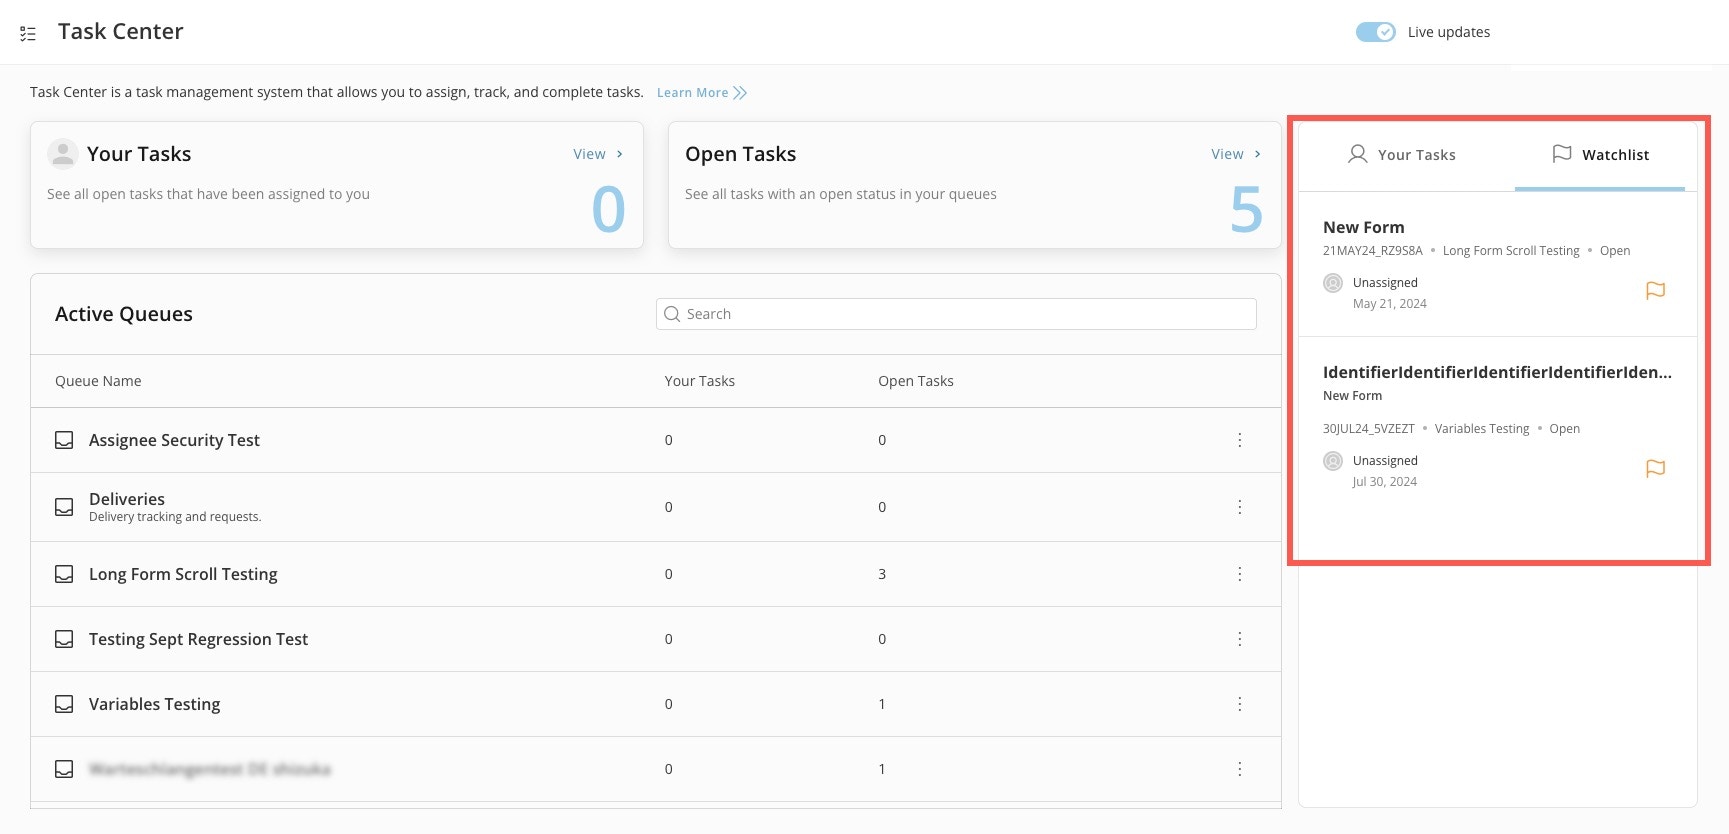
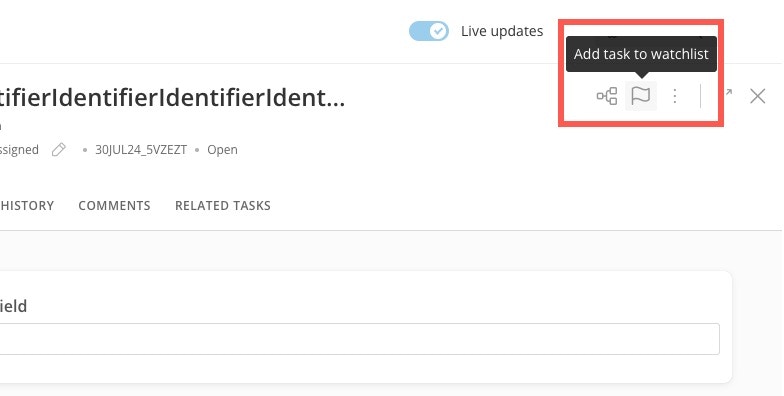
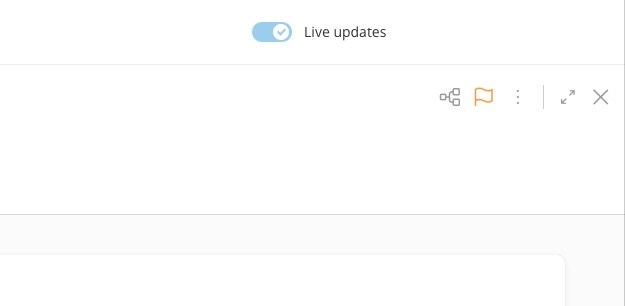
 Add task to watchlist.
The flag icon turns orange.
Add task to watchlist.
The flag icon turns orange.
Unlock a Task
If a task is being edited by another user, it displays as locked. If you have Admin permission for the queue, you can choose to unlock the task. Note that this can allow edits to be overwritten by another user.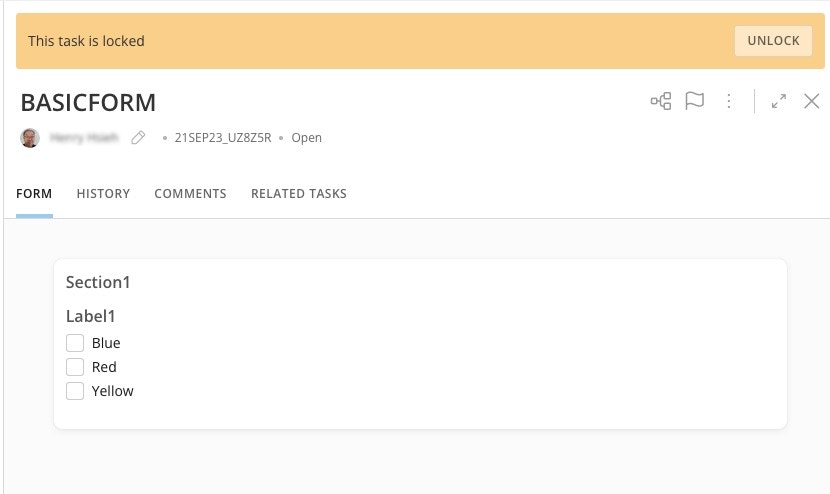
Void a Task
Voiding a task cancels it and gives it a Void status. A voided task doesn’t pass any data back to the workflow and places the workflow in a Failed state. Void a task in the form viewer by selecting More (three vertical dots icon) > Void Task.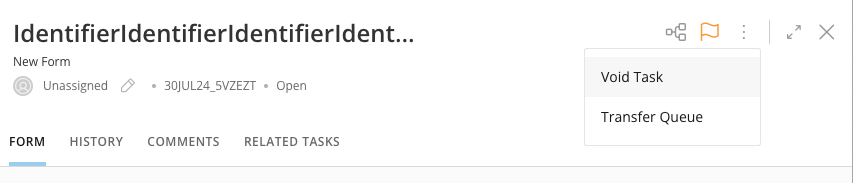
Transfer a Queue
If you want to transfer a queue, you must choose another queue to send the task to, use the modal. You can only transfer to another queue that you have access to.Edit the Form
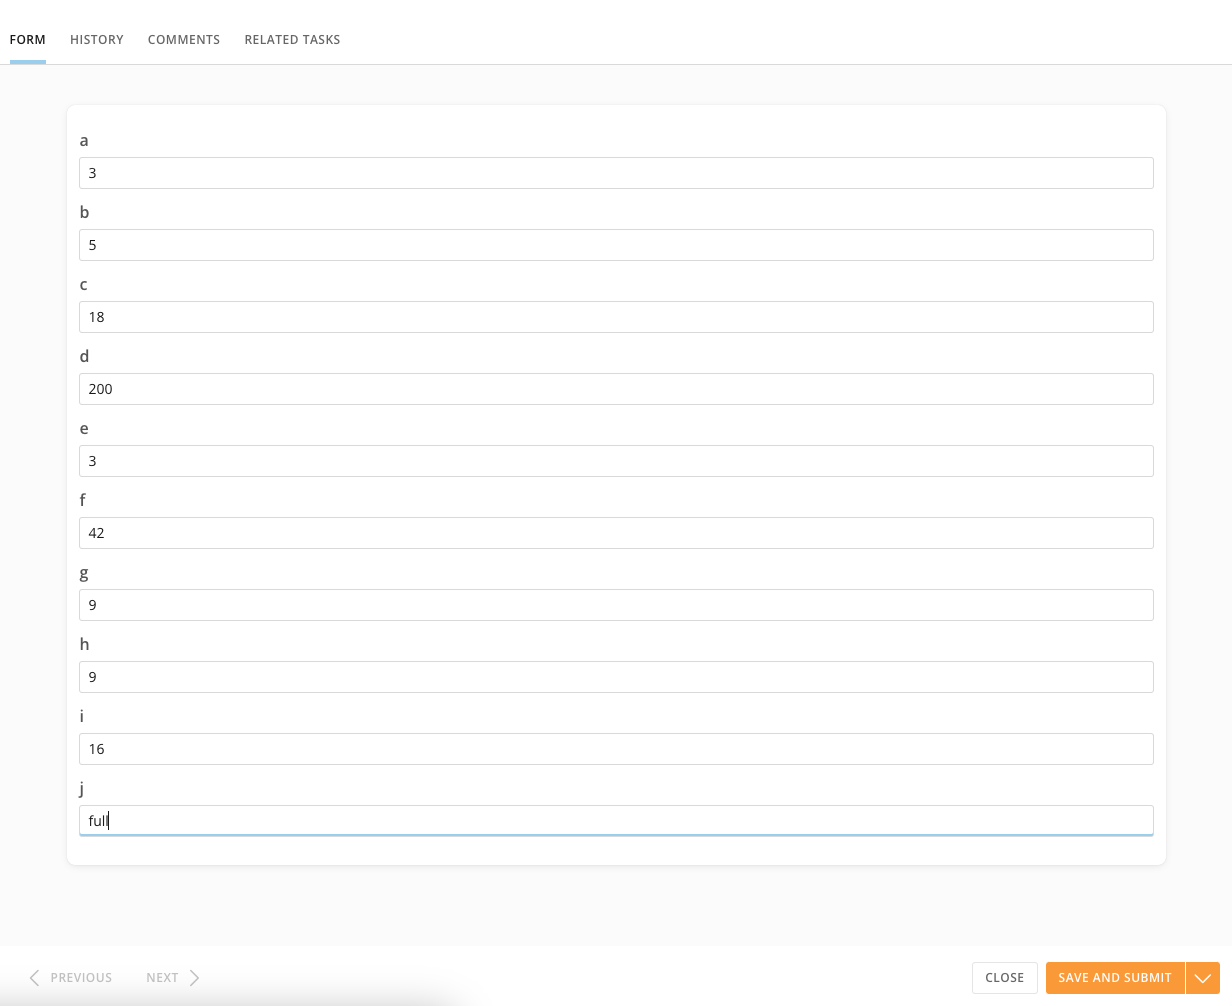
The Form tab allows you to add data to the form. Select Save and Submit to save your changes.- If the form has multiple pages, you can navigate through them using Previous and Next.
- After entering data in the fields, you can save the form without submitting it by selecting Save. This saves all the data entered in the task and keeps the form in an Open status. You can then close the task and return to the form in its most recently saved state.
- The option to Submit is enabled only after you fill in all the required fields. Submitting the data you entered in the fields updates the task to Completed status. The workflow that created the task consumes any data marked as output in the form configuration. After you submit a task, you cannot make updates or change the status back to Pending.
- Anyone with Update Content permission for the queue containing a task in Open status can update the task, regardless of whether they are assigned to the task.
Important: You must fill out all required fields in the form to save or submit your changes.
View Task History
The History tab displays all events for the task. For every event, you can view the time, the person who made the update, the event type, and a description.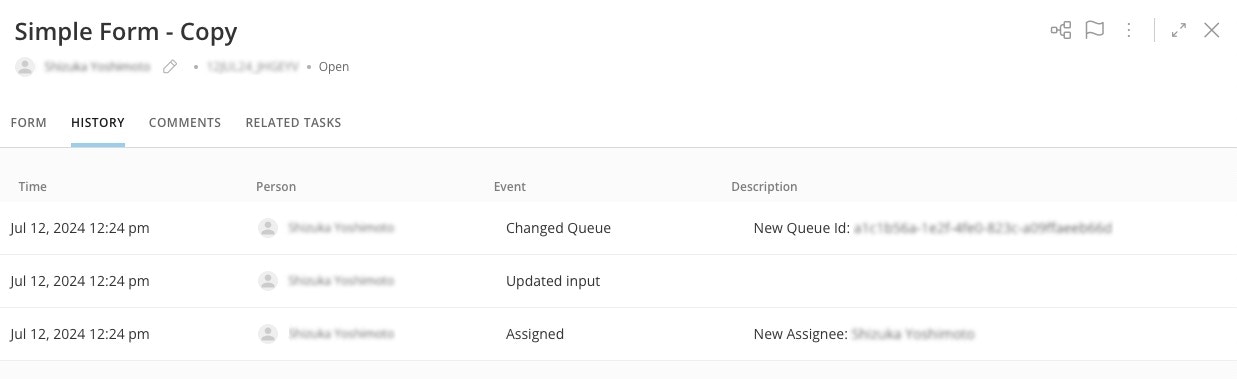
Add Comments
The Comments tab displays comments that have been added to the task. These can be personal notes, messages to other task viewers, or general information. You can continue to comment on a task after it has been completed.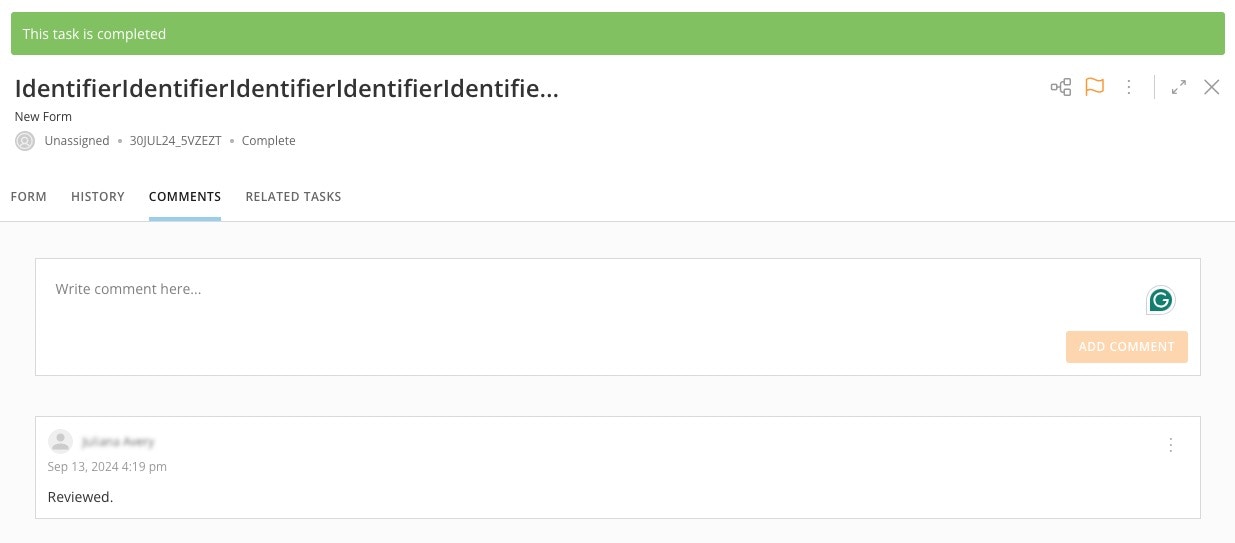
View Related Tasks
The Related Tasks tab displays information about other tasks generated by the same workflow execution.Notes:
- You can only see other tasks to which you have access.
- This feature does not allow manually linking a task to another task.
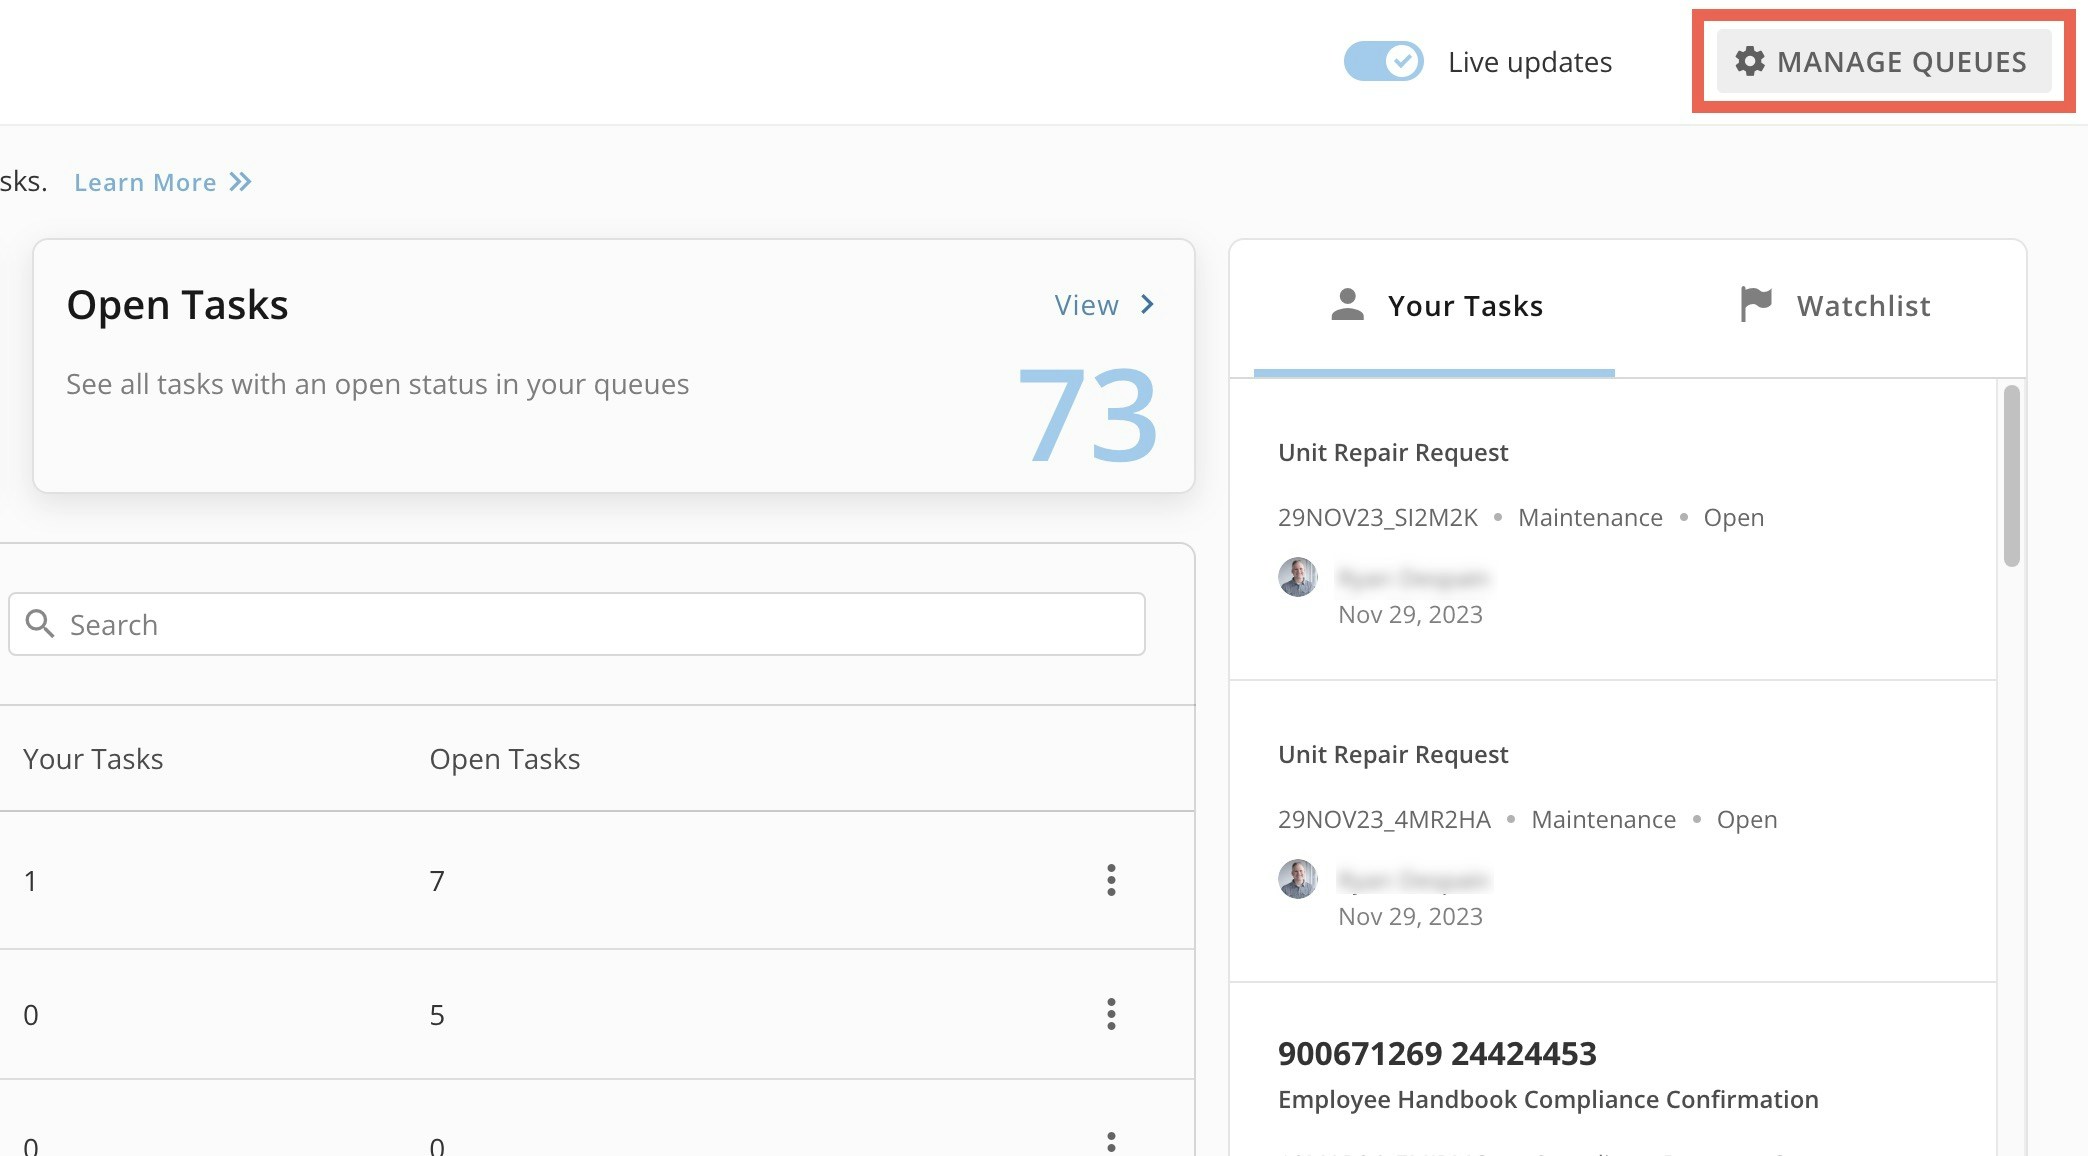
Manage Queues
Admins can select Manage Queues to see the Task Lis with all the queues in the instance. From this interface, admins can create and archive queues and enable Assignee Security.
Create a Queue
Task Center admins can follow these steps to create a queue:- Inside Manage Queues, select + New Queue to open the New Queue modal.
-
Enter a name and description for the queue. Select New Queue to save it to your list.

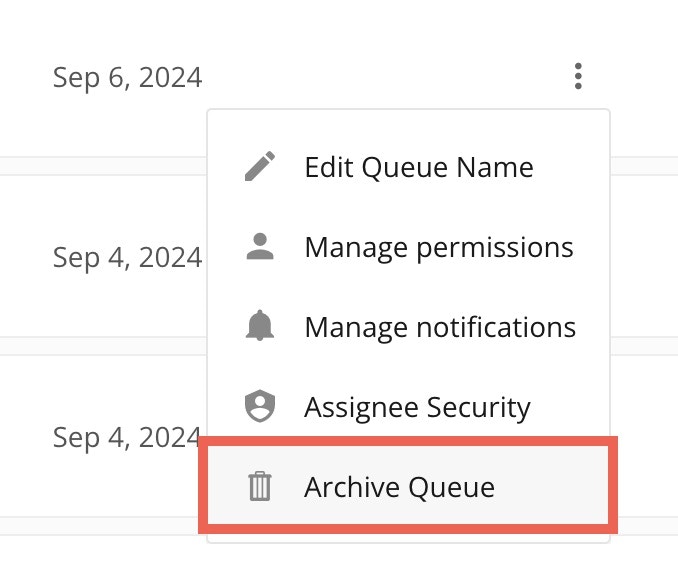
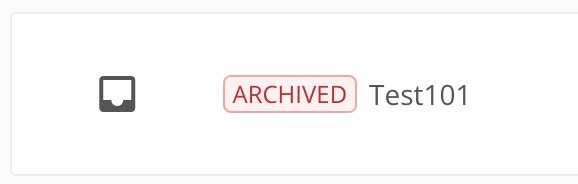
Archive a Queue
Task Center admins that have Admin permission to a queue can archive it and make it inactive for end users. However, users can still access archived queues and retrieve completed tasks that reside within them. When a queue is archived, no tasks can be generated in it or transferred to it. In addition, all open, unresolved tasks are either moved to another queue or updated to Void status as part of the archiving process. All previously completed tasks remain in the archived queue and can be retrieved as needed for audit purposes. Follow these steps to archive queues:-
Inside Manage Queues, select the
 vertical three dot menu for the queue you want to archive.
-
In the menu, select Archive Queue to open the archive modal.
The modal displays a list of all tasks in the queue and if the queue is being used in any workflows.
-
Use the Action dropdown to choose to transfer open tasks to another queue or void tasks to cancel them.
- If you select Transfer Tasks, you must choose another queue to accept the open tasks and then proceed to the next step.
- If you select Void Tasks, move to the next step.
- Select Save and Archive.
Activate Archived Queues
Follow these steps to activate an archived queue:-
Inside Manage Queues, locate the archived queue you want to activate and select the vertical three-dot menu.
- Select Activate Queue .
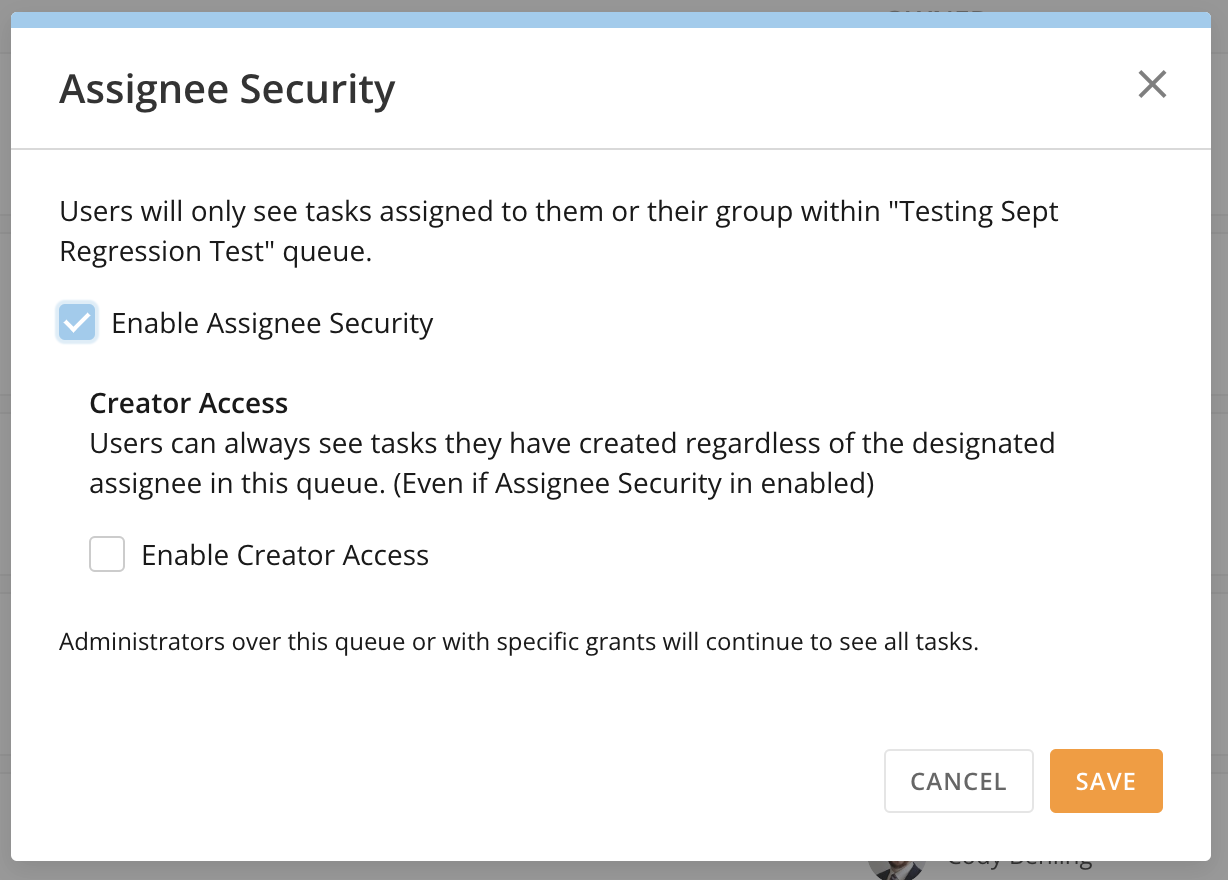
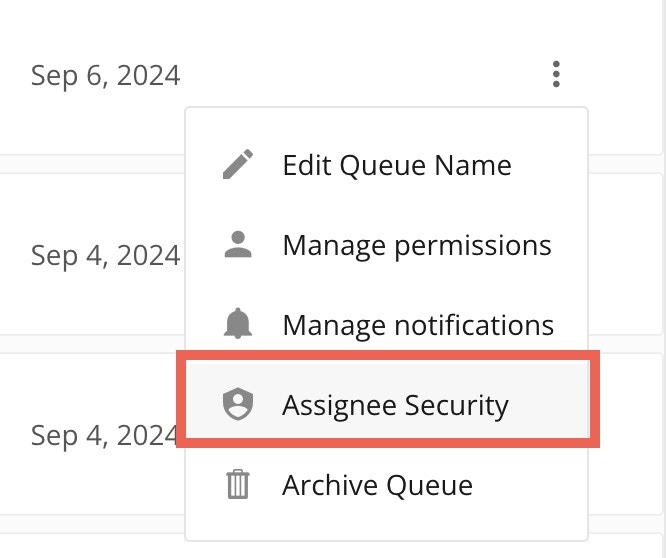
Enable Assignee Security
The Assignee Security setting restricts task visibility to assigned users and/or their groups. Task Center admins can enable/disable this setting for each queue. When Assignee Security is enabled, users without Admin permission to the queue will only see tasks assigned to them or their groups. All group members can see tasks assigned to the group. Users with Admin permission to the queue will continue to see all tasks. Task Center admins can follow these steps to enable Assignee Security for a queue:-
In Manage Queues, select the vertical three-dot menu for the queue for which you want to manage notifications.
-
Select Assignee Security
to display the modal.
-
Check the box labeled Enable Assignee Security and save.